baked cod with sweet creamy sauce

20151104_200243

I literally conjured up this recipe in my head whilst showering this evening before i enter my kitchen to cook for dinner. I had two slices of cod thawing but no idea how to cook it. Then i had a revelation of combining the element of salty from the fish and sweetness from the accompanying sauce and hey presto! It worked and my missus loved it.

Serves 2

2 pieces of cod fillet

a stick of salted butter

half a lemon, to squeeze for juice

¼ cup of breadcrumbs (or use cracker, smashed until bits)

olive oil

for the sweet creamy sauce

one onion, finely chopped

a stick of unsalted butter

a cup of cooking/single cream

Preheat oven to 200°C. To prepare the fish, melt the salted butter. Once melted, remove from heat and stir in the breadcrumbs until all coated with the melted butter. Finally squeeze the lemon to get the juice out. Prepare a baking dish, drizzle some olive oil on the surface. Place the cod side by side, top-off with the combination of butter-breadcrumbs. Bake inside oven.

Heat a small skillet or sauce-pan. Lug in some olive oil and add in the onion. Carefully under low-heat you want to caramelize the onion without browning it. The caramelized onion is the one that will give the sweetness of the onion. Once caramelized, melt in the unsalted butter. The reason for the unsalted butter is because i do not want the saltiness of the salted butter to overpower the sweetness of the onion but if you have no choice, add in a teaspoon of sugar to help to get it sweet. Once the butter is melted, add in the cooking cream and let reduce until the sauce is thick.

Spoon out the sauce onto a plate and serve the cod on top of it. Optionally add some greens onto the plate as i have done on the pics.

pan-seared tilapia with salsa

20151019_200520

For this recipe, instead of using normal tilapia like most recipes you can find on the net, i opted for red tilapia because it is not as strong as to overpower the sweetness of the salsa.

Ingredients (Serves 4)

2 tomatoes, seeded and chopped

1 large onion, chopped

a small slice of watermelon, diced

1 orange, peeled and diced

2 tablespoons of diced feta cheese

juice of half a lemon

2 tablespoons of extra virgin olive oil

6 fillet of red tilapia

salt and freshly ground black pepper

all-purpose flour/wheat flour, for dusting

To make the salsa, stir in the tomatoes, onion, watermelon, orange, feta cheese in a bowl. Add in the lemon juice and the olive oil, and season with salt and black pepper. Toss everything together and check the seasoning. Once satisfied, set aside in a refrigerator to chill.

Now for the fish, season them with salt and pepper. Heat a good drizzle of olive oil on a pan. Dredge the fillet in flour and shake off the excess. Sear the fillet in the pan until golden brown and the skin crispy.

Serve the fish on a plate with a few generous spoonful of the salsa on top.

basic beef stew

20151017_200334(0)

Stewing beef, or any other meat basically can be broken down into two steps, reducing the stew and then simmering until the end. There are loads of variation on how to prepare beef stew, but what i’m showing here will be the most basic stuff which after you have mastered can be taken into the next level.

Ingredients (Serves 4)

for the beef

a kilo of cubed beef chuck (chuck is used because it is one of the toughest meat on a cow, suitable for long cooking that stewing involved)

all-purpose flour/wheat flour (enough to cover the meat)

white pepper powder (enough to cover the meat)

paprika powder (enough to cover the meat)

for the stew

2 tablespoon of butter

a tablespoon of cornflour/cornstarch

2 litres of beef stock

one large onion, diced

a tablespoon of tomato paste/puree

4 medium carrots, cut into small pieces

3 large russet potatoes, peeled and cut into golf ball pieces

4 celery stalks, cut into small pieces

2 bay leaves

a teaspoon of dried rosemary

a teaspoon of dried parsley

salt & freshly ground black pepper

Mix the flour, white pepper and paprika powder in a bowl and coat the beef entirely. Pan fry the beef on a skillet until brown on all side. Transfer to a plate and set aside.

Melt butter in a large deep sauce pan or pot. Cook the onion until lightly browned. Then add the tomato paste and cook while stirring for about a minute. Then stir in the flour, and cook until the flour had absorbed the liquid inside the pan. Immediately deglaze with a litre of the beef stock and bring to a simmer. Add the beef, the bay leaves, rosemary and parsley and let reduce the liquid for about an hour. It the liquid has reduced to much before the hour mark, add a cup or two of water. Once the stew has reduce, add in the remaining beef stock, season with salt and pepper and stir in all the remaining vegetables including the potatoes. Cover the pan and continue simmering for another hour.

About 15 minutes until the final hour mark, finish off with a dash of lemon juice and check the seasoning. Add more salt and pepper to your desire. If you want a thicker broth, leave that final 15 minutes of simmering with the cover off, otherwise return the cover to the pan.

Serve with bread, baguette or own its own. Marvelously delicious!

20151017_200240

a proper fish & chips

20151016_200449

The easiest way to prepare a fish & chips is to buy the ready to fry, frozen dory fillet from the Pacific West brand. Of course that’s only suitable for losers whose experience in the kitchen is only limited to cooking instant noodle maggi mee. God knows if the fillet they used is actually dory fish.

To prepare a proper fish & chips is to buy an actual dory fillet. Here you can get one in the frozen section you’d normally find your frozen mackerel, cod, salmon and other continental fishes. Dory is the cheapest one, they sell about between RM8.90 – RM10.90 per pack of which each pack contains four fillets, enough for two dinner for 2.

Now the crux of cooking fish & chips is the batter. I have sample a lot of recipes on preparing the batter from the most complicated 10 ingredients one to the most simple, by far the best in my opinion is the one below. It resulted in a good, sufficient crispy fish that is to my liking.

Preparing the batter

½ cup all purpose flour (or regular wheat flour)

½ cup of corn flour/corn starch

a teaspoon of baking soda

½ cup of milk

½ cup of ice water

salt for seasoning

That batter is sufficient for all 4 fillets you would find in one pack as i described above.

Some recipe call for the use of an egg but i find that it hardly make any difference on the end result so i omit the use of an egg. Stir everything in a mixing bowl, don’t worry if the batter is lumpy, the lumpier the better as it is a signature for home cooking. I never like perfect smooth batter, i think that’s pretentious. Season the batter with salt to your liking by dipping your finger into it and having a little taste.

Heat your oil, dip the fish into the batter, pick it up and always, ALWAYS allow the excess to drip off. Let only a thin coating of the batter left clinging on the fillet. The biggest mistake Malaysians always do when frying fish dipped in batter is that they allow the batter to coat the fish heavily, as if they are preparing cekodok/cucur/cucoq which is the stupidest thing you can do. Remember, you want to taste the fish, not the flour!

Holding one end, lower the fish into the oil one by one, carefully so you don’t get splashed – it will depend on the size of your pan how many fish you can do at once. Cook until batter is golden and crisp.

For the chips, take some russet potatoes, cut it into wedges with the skin left on, boil in salted boiling water until soft, drizzle with a good lug of olive oil and bake in an oven at 230°C until golden and crispy.

pan-fried pollock with parsley sauce

20151006_201828(0)

Pollock is the poor man’s cod. But unlike what those kind of statement normally imply, it’s actually delicious. Couple with the parsley sauce, which is essentially a modified bechamel sauce you use to bake lasagna, it’s a match made in..a plate!

Serves 2

4 pollock fillet

olive oil

freshly squeezed lemon juice

salt & freshly ground black pepper

for the parsley sauce

200ml of full fat milk

1/2 medium onion, quartered

1 bay leaf

a stick of butter

a tablespoon of flour

small bunch of curly parsley, chopped

salt & freshly ground black pepper

First, make the sauce. Pour the milk into a saucepan and add the bay leaf and the onion. Turn on the heat and bring to a gentle simmer for 5 minutes. Then turn off the heat and once cool, remove the leaf and the onion. Set aside.

Sprinkle the pollock lightly with salt. Heat the olive oil in a non-stick sauté pan over medium heat. Fry the fish in the pan, skin-side down. Turn down the heat and let fry until the skin browned, then flip it over, turn back the heat to medium and fry until just done. When the fish is about done, squeeze some lemon just over it and season with the black pepper.

Set the fish aside and finish off the sauce. Melt the butter in a small pan and stir in the flour. Cook for 30 secs. Slowly add the milk to the pan, stirring and simmer gently for 5 mins, all the while stirring continuously. Stir in the parsley and add a little extra milk if the sauce seems too thick. Season with salt and pepper. Keep warm over a low heat, stirring occasionally until ready to serve.

slow roasted shoulder of lamb

20151004_200451

This is the best, most simple, fall off the bone, shoulder of lamb recipe you’ll ever need. Since the technique involved slow roasting, set aside 4 hours of your time in order to have this heavenly dish.

For the marinade

one bulb of garlic

a tablespoon of paprika powder

a few lug extra virgin olive oil

salt & freshly crushed black pepper

Preheat your oven to the max.

To make the marinade, smash everything inside the pestle & mortar except for the salt and pepper until it become a paste. Rub the marinade all over the lamb, then season with salt and pepper. Make sure you trim the lamb of all the fat at the side with a sharp knife.

Once your oven is hot, lay the lamb nicely in a roasting pan side by side. Crush some more garlic clove and put it on top of the lamb, with the skin on. Lay together a few sprigs of rosemary, or a stalk of lemongrass if you want to localize the dish on top of the lamb. Tightly cover the tray with aluminum foil and place in the oven. Turn the oven down immediately to 170 degrees C and cook for 4 hours – it’s done if you can pull the meat apart easily with 2 forks.

20151004_200638

Equipping your kitchen

A lot of newcomers learning how to cook non-professionally at home or newly-wed couples entering their first kitchen get turned-off of cooking when they learn the various tools and equipment they need to own. Their so and so friends or grandma, or aunties or the various cook books and cooking shows and advertisements trying to sell them the idea that they need to fortify their kitchen with kitchen-ware as if they need to turn their kitchen into a full-blooded 3-star Michelin restaurant.

The fact is, you only need so much of what you will actually use. I will give you a lowdown of what you actually need, based on necessity and personal experience. Of course the list I about to give you is neither definitive nor exhaustive since what you will cook may differ with what I normally cook at home. But I’m giving you an idea of what you may necessarily be using on a day to day basis. This shall be like your basic tool-box, as you improve in your cooking skill, you may decide you need that shiny equipment as advertise in those infomercial in Channel 118 of Astro.

Knife

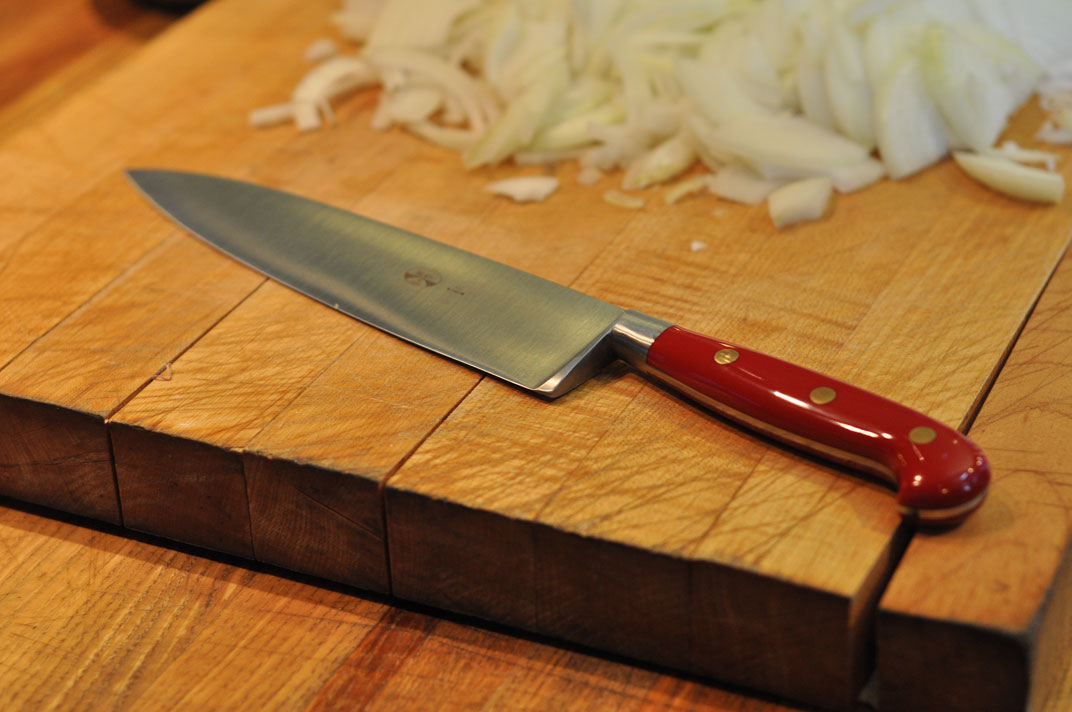
Now the first thing you need, the most important most essential tools a cook needs to have, is a knife. Not those bullshit 5-knives set with colorful and sometime printed flowery picture that are garbage and where you’ll definitely end up not using them but a simple, decent, chef’s knife. I could probably spend an entire column discussing about the anatomy, physiology and history of a chef’s knife but I wouldn’t want to waste your time. It looks like this:

5261407655_e3738c11e8_o

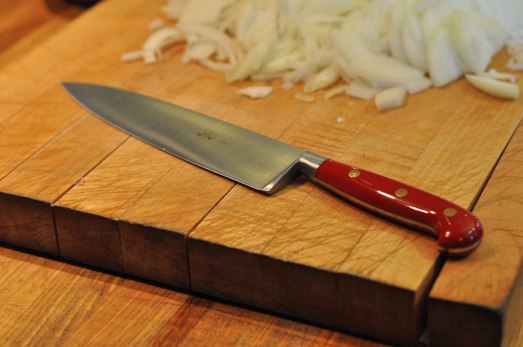
 Please believe me when I tell you that you only need one of that in your entire cooking life. Not those full set, serrated things your facebook/instagram friends try to sell you no matter what stories they cook-up about the “magic” those knives can do. Just buy ONE chef’s knife, the length will depend on how comfortable for you to hold and use it.

For brand, depends on your preference. If you have money to burn, you can go for those high carbon stainless-steel German blades like J A Henckels. Those will set you an upward of RM300++. But high carbon blade is hard to maintain and unless you are prepared to spend fifteen minutes every couple of days working that blade on an oiled carborundum stone, I’d forgo them for vanadium steel instead. The best I can recommend is the Japanese made Global, or Kai. Theirs cost between RM100++ to RM200++. You chef’s knife will be used for everything, cutting, chopping, filleting, slicing, boning, loping, you name it. Learn how to handle your knife properly if you prefer to keep all ten fingers until the day you die, there’s a lot of websites and youtube videos that can offer that. If it ever gets dull then sharpen them as per the instruction the company tells you how to, or if you’re extremely hopelessly lazy just buy a new one.

Pots & pans

Obviously you need them to do the actual cooking. Deep bottom saucepan of various depth, at least two, one large and one medium. I can’t stress enough that your pot/saucepan must be thick-bottom. I don’t care if they tell you that it is bonded with copper, rubbed by the hands of 40 virgins, using the material NASA use to send their rocket into space, a thin-bottom pot/saucepan is good for nothing. If you prefer scorched pasta sauce, carbonized chicken, burnt garlic, then go ahead and buy those “cap harimau” pot/saucepan you can find in those Chinese hardware store.

Sauté pan. You’ll need those for a majority of dishes. They also need to be thick-bottomed and very heavy. How heavy you ask? Heavy enough to cause serious injury when smacked against the head of a person. If you are not sure which will dent; your pan or your victim’s head, then throw away that pan into your trash. If you chose to buy non-stick pan instead, treat it nicer that your wife. Never wash it but wipe it clean after every use. And for God’s sake never use metal on it, use wooden spoon or plastic spatula to toss and turn whatever you’re cooking in it. Metal is like kryptonite to non-stick pan, they’ll scratch the surface.

Wok

A wok is the most versatile equipment to cook with. You can use it for deep frying, stir frying, making sauce, even steaming (heat water on it and put your bamboo steamer on top of it!). I always find stir fried vegetables in a wok tasted better that using a sauté pan. It offers width for cooking that pots and pans sometimes could not.
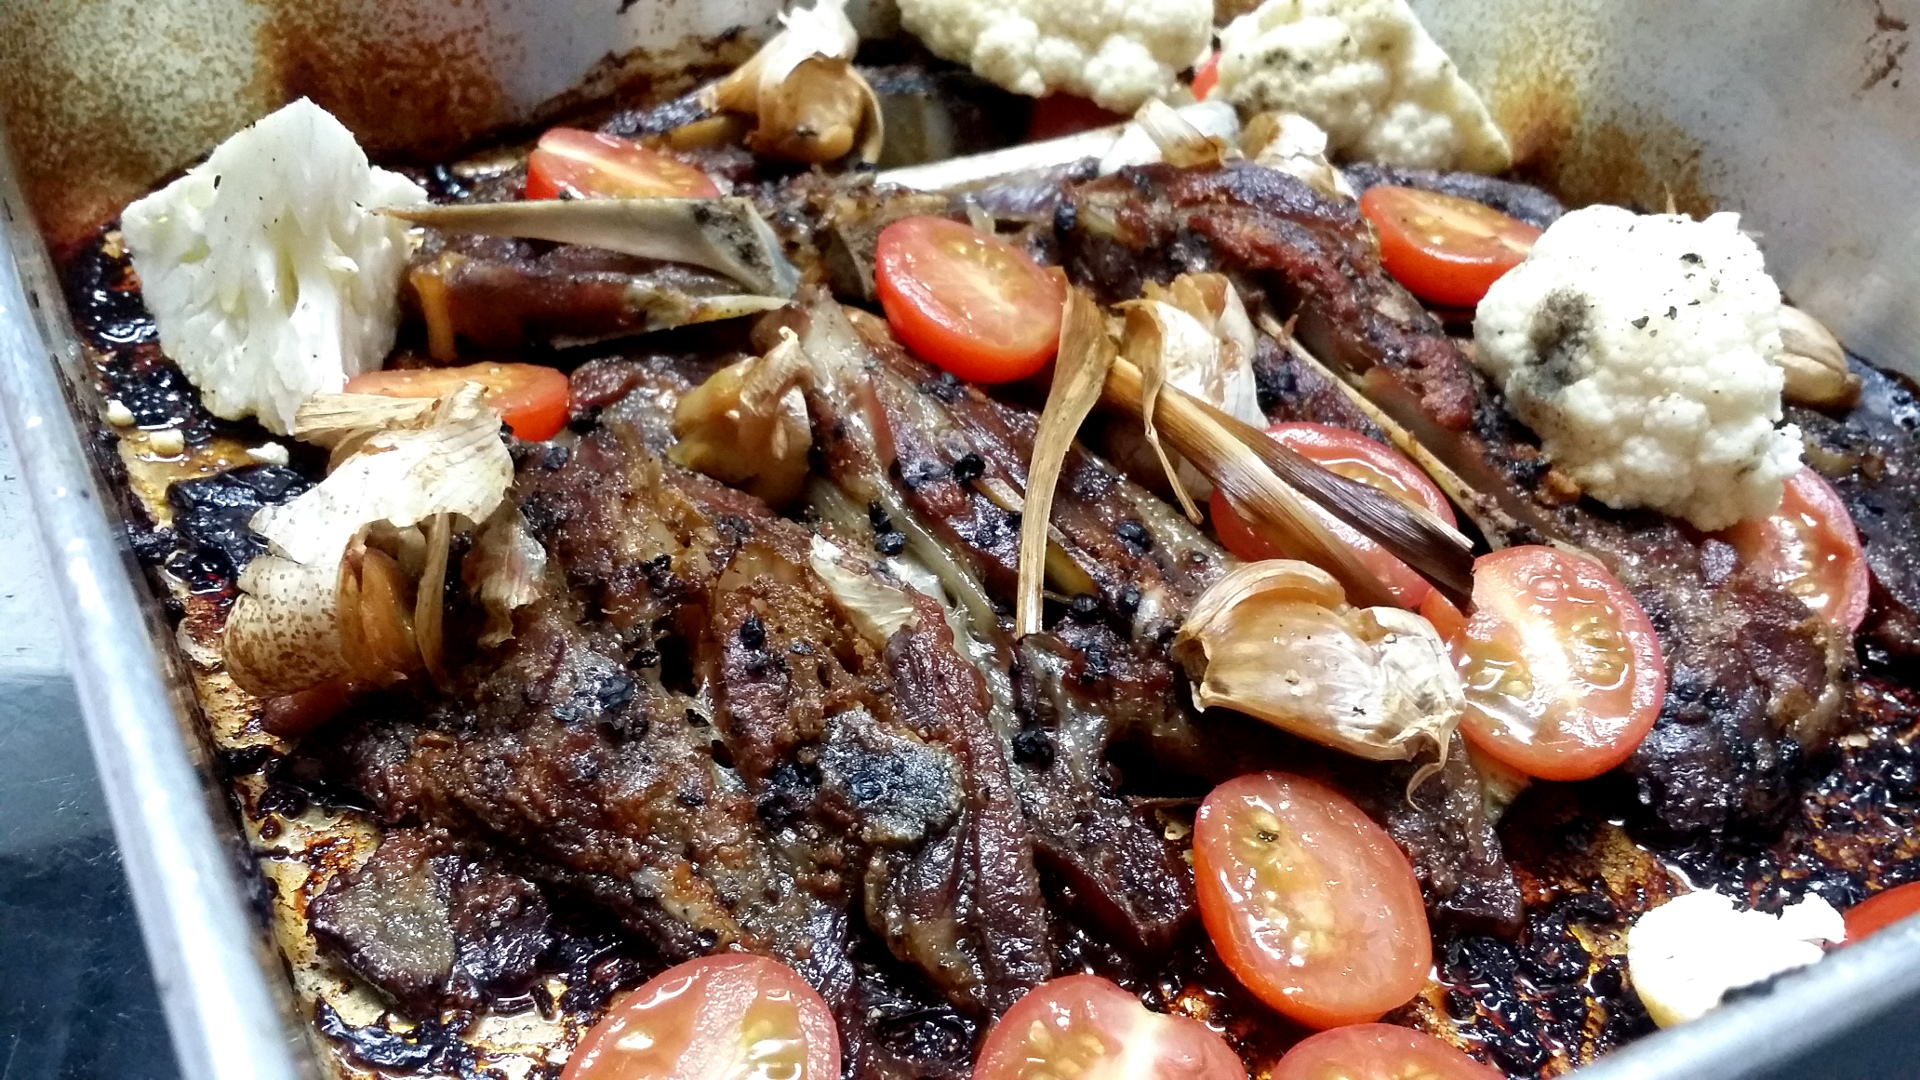
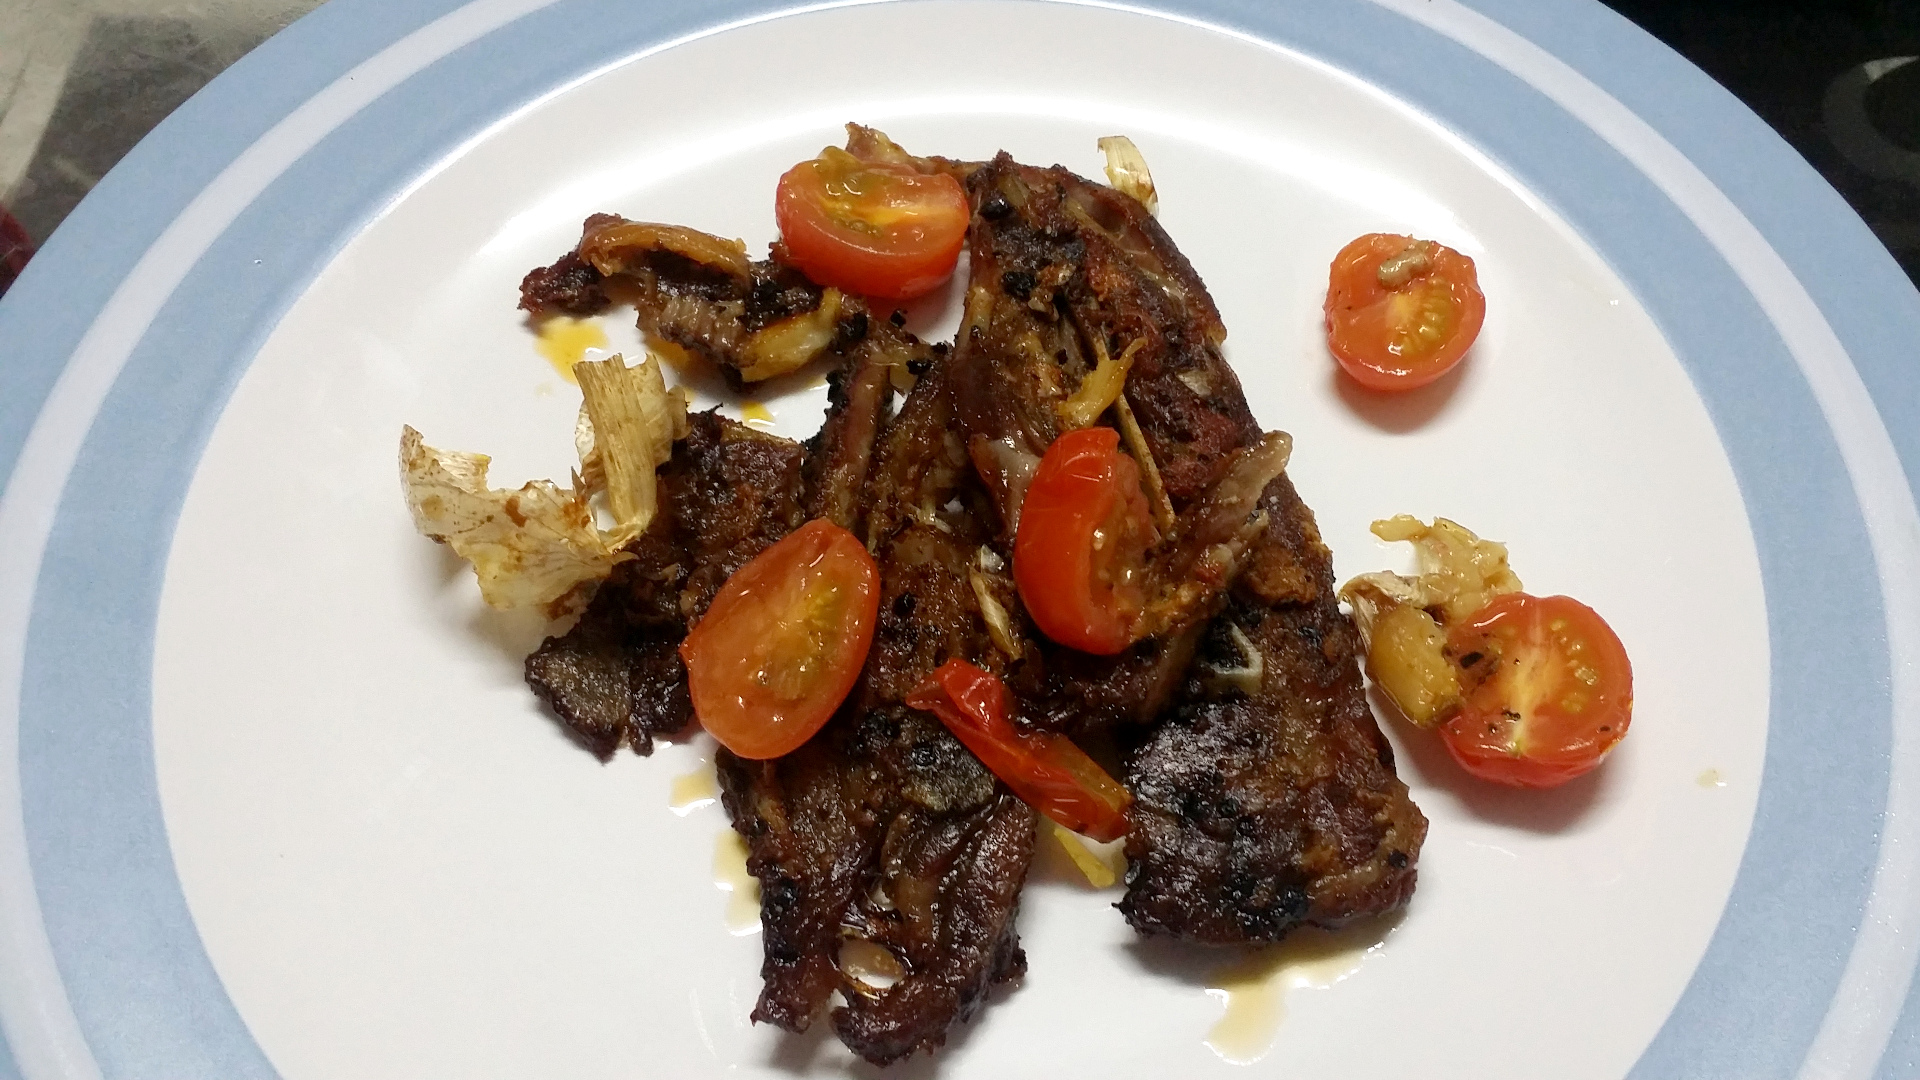
Oven

The difference between normal oven and convection oven is those convection ovens have fans to circulate air around the food being cook resulting in evenly cooked food in less time than normal oven. Any type of oven is fine so long as it is big enough for you to roast an entire chicken in it. Of course, a bigger oven is always preferred and no, microwave oven is NOT an oven.

Pestle & mortars

Before anyone asks, no, it’s not mortar where the army use in the battlefield as support artillery to blow up enemy soldiers into chunks and pieces. What I mean is lesung batu, and no house in this country at least should be without one.

Blender/food processor

Blender can sometimes handle jobs that food processor normally does, but never the other way around. So if you’re strapped for cash, always put priority over buying a blender than a food processor.

Utensils

The most obvious, you forks, knives and spoons; specifically, you’ll need things like can opener, colander, whisker, potato peeler, tongs, grater, measuring cup which can measure up to 500ml@2½ cup. Anything else I’ve forgotten?

Side ingredients

There are ingredients that separate restaurant quality dishes from home cooked dishes that made all the different in the world. Sadly these ingredients are taken for granted that not many people have them ready all the time or know how to us them properly. Always have these ingredients handy and restock ready to be use at a moment’s notice.

Shallots

These little guys are ubiquitous in this country but are always taken for granted. Not many kitchens have them readily or used in cooking constantly. Perhaps maybe because they are small it is quite cumbersome to peel and people always substitute them with regular red onion thinking them of the same. But no, they’re not the same nor serve the same function. Whenever and whatever you are sautéing, despite it not being called for use in your recipe, always add in chopped/sliced shallots into it, or use it in sauce. They will make a difference to your dish.

Garlic

Garlic is God’s gift to human beings. Treat it with respect. Never put it into that presser thingy they called the garlic presser. Whatever spewed out of that thing, that is not garlic. Smash it with the flat of your knife blade, or using a mortar. Roast it entirely while it is still in cloves to be squeezed out when soft and brown. They will taste as sweet. Sliver it onto your pasta, or your salad dressing, into your aioli or vinaigrette, add it into your marinade for fish or chicken, they will all taste wonderful.

Lemon/lime

Ever wonder why everytime you ordered fried mee at mamak’s they always served it with half a lime? It’s not so that the mee will taste like lime, but rather to have contrast in the taste where the lime acted as vinegar. Add some lemon/lime juice into whatever you are cooking to have that contrast and brighten up your dish. Try this experiment, take a spoonful of whatever you’re cooking and have a taste. Then, take the same spoonful only this time add a drop of lemon/lime juice into it and see the difference.
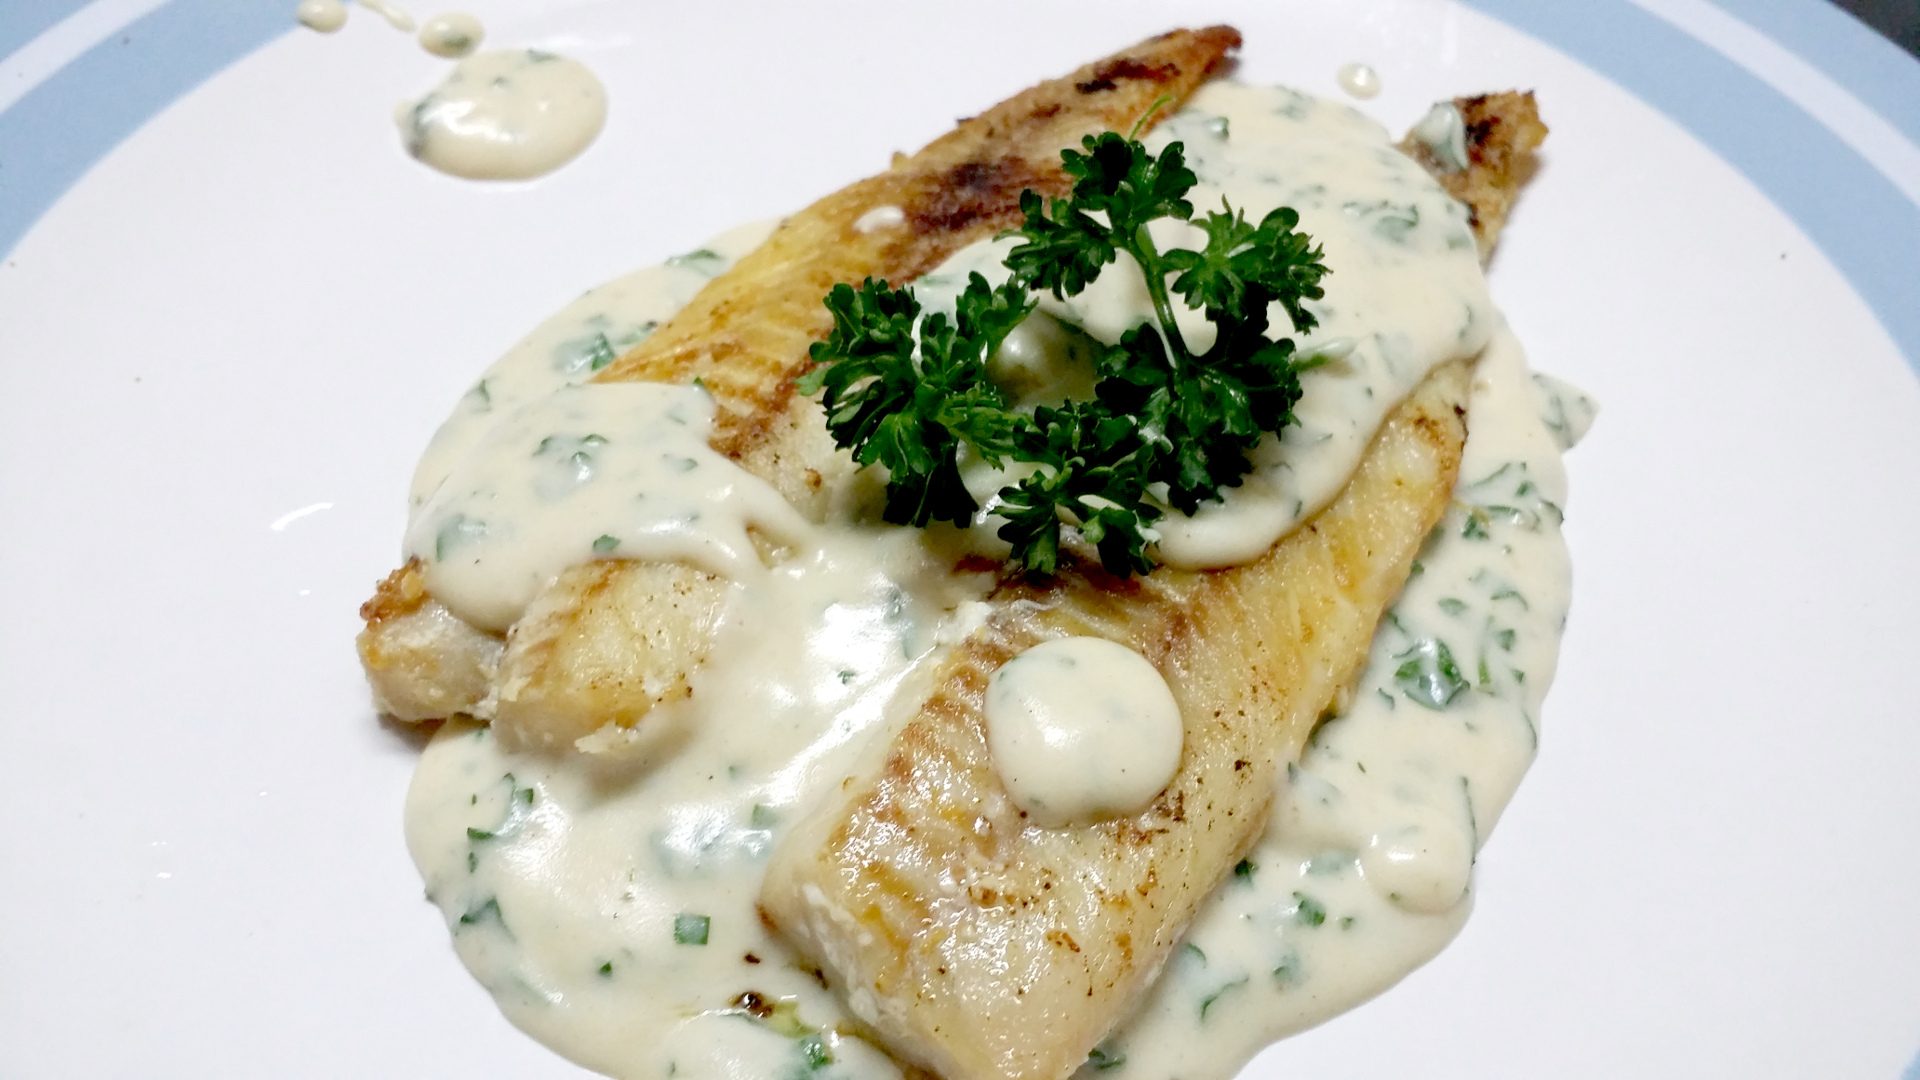
Butter

Butter is my favourite subject. Despite what you think, every dish you ever ordered in a restaurant starts-off with butter and ended with butter. That nice brown caramelize color you see on my onion is achieved by a mixture of butter and oil. I add in butter as a finisher or starter in almost all dishes that I cook. I finish off my pomodoro (tomato) sauce with butter, roasted anything with a touch of butter, all my soups ended with butter, my scrambled egg always starts with butter, my entire life wouldn’t be complete without butter in my refrigerator. Slather some butter onto a croissant and see your world light up like fireworks. Margarine? That’s not food. Never ever substitute butter with margarine, that’s the worst crime anyone can commit. Learn to know how to differentiate between both. If it’s cheap, less than RM5, and you can find the word “palm” and “oil” in the ingredient’s list, that’s margarine. Butter is always made from dairy.

roasted mackerel with garlic and paprika

20151007_200444

Mackerel is a wonderful fish that most people take for granted. In my opinion, mackerel is superior than the over-hyped salmon which is more expensive and sometimes overrated. It’s such a lovely fish, cheap and plentiful, and, served with aioli makes it the perfect dinner you can have with little fuss.

Ingredients

mackerel fillet, skin on

2 cloves of garlic

2 tsp of paprika

extra virgin olive oil

1 tbsp of lemon juice

freshly ground black pepper & salt

Preheat oven at 210 dg C.

Start by preparing the marinade. Put the garlic and paprika into a mortar (lesung batu), add the salt and pepper, and pound to a smooth paste. Add a few drops of olive oil and lemon juice, mix well and then rub the flesh side of the mackerel fillets with the paste and set aside.

Line a baking sheet with tin foil and drip some olive oil onto the surface. Lay the mackerel fillets skin side up, give a final seasoning with salt and pepper. Drizzle some olive oil and roast for 10-15 minutes until the skin is crisp and the fish is cooked through.

Once cooked, lay the fish to rest for a while and serve with any side you wish for.

roasted crab with creamy-butter sauce

image

In order for this dish to be worth your time you need to be using mud crab, dungeness crab or stone crab.

The serving size for this recipe is for two large crab, cut into pieces, sufficient serving for two. When increasing the serving size, always ensure every can of condense milk is exactly for half a brick of butter, and take ot forward from there.

Ingredients

Crab, obviously, cleaned and cut into pieces
Half a brick of unsalted butter
A can of evaporated milk
One onion, diced
Two cloves of garlic, crushed
Chili, thinly sliced (optional)
Salt and freshly ground black pepper

Start by melting your butter in a large saucepan or a large wok. Once melted, stir in your garlic and the onion and fry until translucent. Add in some chilli if you like some heat in your sauce, then pour in the evaporated milk. Let reduce for about 10-15 minutes while stirring constantly. Season well with salt and pepper.

Then stir in your pieces of crab. Stir for about a minute or two, ensuring all pieces are coated by the sauce. Finally transfer the crab and the sauce into a roasting dish and finish the cooking in a pre-heated oven at 230 °C for 15 minutes.

baked meatball with tomato sauce

20150922_202951

Despite its simple form and style, there are considerably some efforts needed to prepare this. First off, prepare the meatball. Here’s how.

Then prepare the tomato sauce. Here’s how.

Finally, pre-cook the meatballs halfway on a pan (by pre-cook I mean half-way or ¾ way since they will be baked inside the oven later). Prepare a square baking dish, pour the tomato sauce into the dish, place the meatballs in, top with some sliced cheddar or grated parmesan or shredded mozzarella and bake until the cheese has melted, about 15 to 20 minutes. Serve with bread.

Perfect for a lazy night of cooking. (provided the meatballs are prepared earlier and making the tomato sauce is no longer considered as troublesome chore)