baked meatball with tomato sauce

20150922_202951

Despite its simple form and style, there are considerably some efforts needed to prepare this. First off, prepare the meatball. Here’s how.

Then prepare the tomato sauce. Here’s how.

Finally, pre-cook the meatballs halfway on a pan (by pre-cook I mean half-way or ¾ way since they will be baked inside the oven later). Prepare a square baking dish, pour the tomato sauce into the dish, place the meatballs in, top with some sliced cheddar or grated parmesan or shredded mozzarella and bake until the cheese has melted, about 15 to 20 minutes. Serve with bread.

Perfect for a lazy night of cooking. (provided the meatballs are prepared earlier and making the tomato sauce is no longer considered as troublesome chore)

pasta with creamy pesto

image

I have seen some establishments charge an upward of RM20 a plate for this shit. Well, this is how you do it for free (not technically free though, you still have to buy the ingredients).

Serving: 2 persons

Pasta (long type such as spaghetti, linguine or short one such as penne)

Half an onion, diced

Cooking cream

Pesto (store-bought at between RM11.90 to RM16.50, good luck if you wish to prepare it yourself though)

Shrimp

Mushroom (optional) (swiss-brown, shiitake, or white-button will do)

Tomato, diced

Two sticks of butter

Bring a large pot of lightly salted water to a boil. Cook your pasta to al dente (refer packet instruction for timing); drain and set aside.

Heat olive oil in a large skillet over medium heat. Sweat your onion until tender over low heat, about 2-3 minutes. Increase the heat, stir in garlic and butter, and cook for about a minute until butter melts. Pour in the cooking cream, season with salt and pepper, and simmer until it is slightly reduced, stirring constantly (about 4 minutes). Stir in pesto. Add shrimp, mushrooms and tomatoes. Cook for about 4 minutes, or until heated thoroughly. Toss with pasta and serve immediately.

chicken katsu

Chicken katsu (katsu is Japanese for the literal translation of cutlet), is a variation of the Japanese dish, Tonkatsu, a breaded, deep-fried pork cutlet. The dish can be served as a single dish, or as filling for sandwiches or accompanied by other dishes such as rice or pasta.

The preparation is pretty simple; in fact, I’ll use fewer words for this recipe and any other I have written. Have a boneless chicken breast, cut them into strips (size and length as per own liking), season with salt and pepper, dredged lightly in flour, dipped into beaten egg and then coat with bread crumbs before deep frying them until golden.

If meant to be served as a single dish, best to eat them with thick sauce such as HP or Worcestershire sauce.

20150927_135546

Beef Steak

I bet my ass that most of you when visiting a steak-house and ordering your RM50 a plate beefsteak, be it in places like Tony Roma’s to Chili’s, would know jack shit the difference between a sirloin, a T-bone or a New York strip. And when the server asked you the type of doneness you would like on your piece of meat, you would probably blurt out “well done” or “medium-rare” with the conviction of an executive chef of a Michelin-starred restaurant, when in fact, you have not a single idea what the hell does that mean, just so to save face to the server like you know what you want.

And let me tell you, anyone who ordered their beefsteak “well done” is a complete asshole, and does not deserve to savour the tastiness and juiciness of a piece of meat from a well grown cow.

Alas, this piece is not about the lesson of ordering beefsteak at a steak-house, but how to prepare the same RM50 a plate cuisine that is so easy to do at home. But, just for the sake of the discerning public and an extra knowledge about the wonderful world of meat, particularly beef, I would throw in some explanation about what is what and which is which.

Cuts of meat

Believe it or not, the meat that you are about to turn into delicious beefsteak or that you ordered from that smirking waiter comes from a cow. And a cow is such a huge animal that there are many parts of its body where the meat is derived from, and each part contributed to the texture and taste of the meat, as well as the price of it. Each part and their meat that comes of it are known as “Cuts of beef” in the world of cow linguistic.

Cuts of beef are first divided into primal cuts, pieces of meat initially separated from the carcass during butchering. These are basic sections from which steaks and other subdivisions are cut. Do not confuse the term “primal cut” to the term “prime cut” which is completely different. Prime cut is a term used to characterize cuts considered to be of higher quality. So you see, the general rule is, since the animal’s legs and neck muscles do the most work (i.e. eating, walking, kicking you off when to try to milk it), they are the toughest; the meat becomes more tender as distance from hoof and horn increases. Different countries and cuisines have different cuts and names, and sometimes use the same name for a different cut; e.g., the cut described as “brisket” in the US is from a significantly different part of the carcass than British brisket. So, for the purpose of this piece I shall use the US type of cuts as I prefer the Yankees than the snotty Brits in general.

Upon slaughter, the beef are split along the axis of symmetry into “halves”, then across into front and back “quarters” (forequarters and hindquarters).

image

Forequarter cuts

· Chuck: The steak from this part commonly known as Chuck steak and Ranch steak. The trimmings and some whole boneless chucks are ground for your burger meat.

· Rib: This is where your short ribs, the prime rib and rib eye steak come from.

· Brisket:  Primarily used for barbecue.

· Shank: The toughest cuts, normally used for stews and soups. Never served as a steak.

Hindquarter cuts

· Short Loin: from which the T-bone, Porterhouse and New York Strip steak comes from.

· Sirloin: The very pricey sirloin steak comes from. There are two parts, bottom and top. Flap steak comes from the bottom part.

· Terderloin: The most tender, and ever more expensive that sirloin. This is where your Fillet Mignon, Tournedos, Chateaubriand and Terderloin steaks originated from.

· Flank:  Inside Skirt and Flank steak. The flank is used mostly for grinding.

· Round: The round contains lean, moderately tough, lower fat cuts, which require moist or rare cooking. Some representative of steaks round steak, eye of round, top round, and bottom round steaks and roasts.

Degree of cooking

The doneness of your steak depends on the amount of time a steak is cooked. It is all about personal preference; shorter cooking times retain more juice, whereas longer steak cooking times result in drier, tougher meat but you wouldn’t worry about contracting e-coli, since the burnt meat will also burned all bacteria and viruses that may be hidden in it. Lest you make fun of yourself in front of your waiter/waitress, a vocabulary to describe the degree to which a steak is cooked are as the following:

· Raw:  Totally uncooked. Sounds gross but actually used in dishes like steak tartare, carpaccio, gored gored, tiger meat and kitfo.

· Blue rare or very rare: Cooked very quickly; the outside is seared, but the inside is usually cool and barely cooked. The steak will be red on the inside and barely warmed.

· Rare: The outside is grey-brown, and the middle of the steak is fully red and slightly warm.

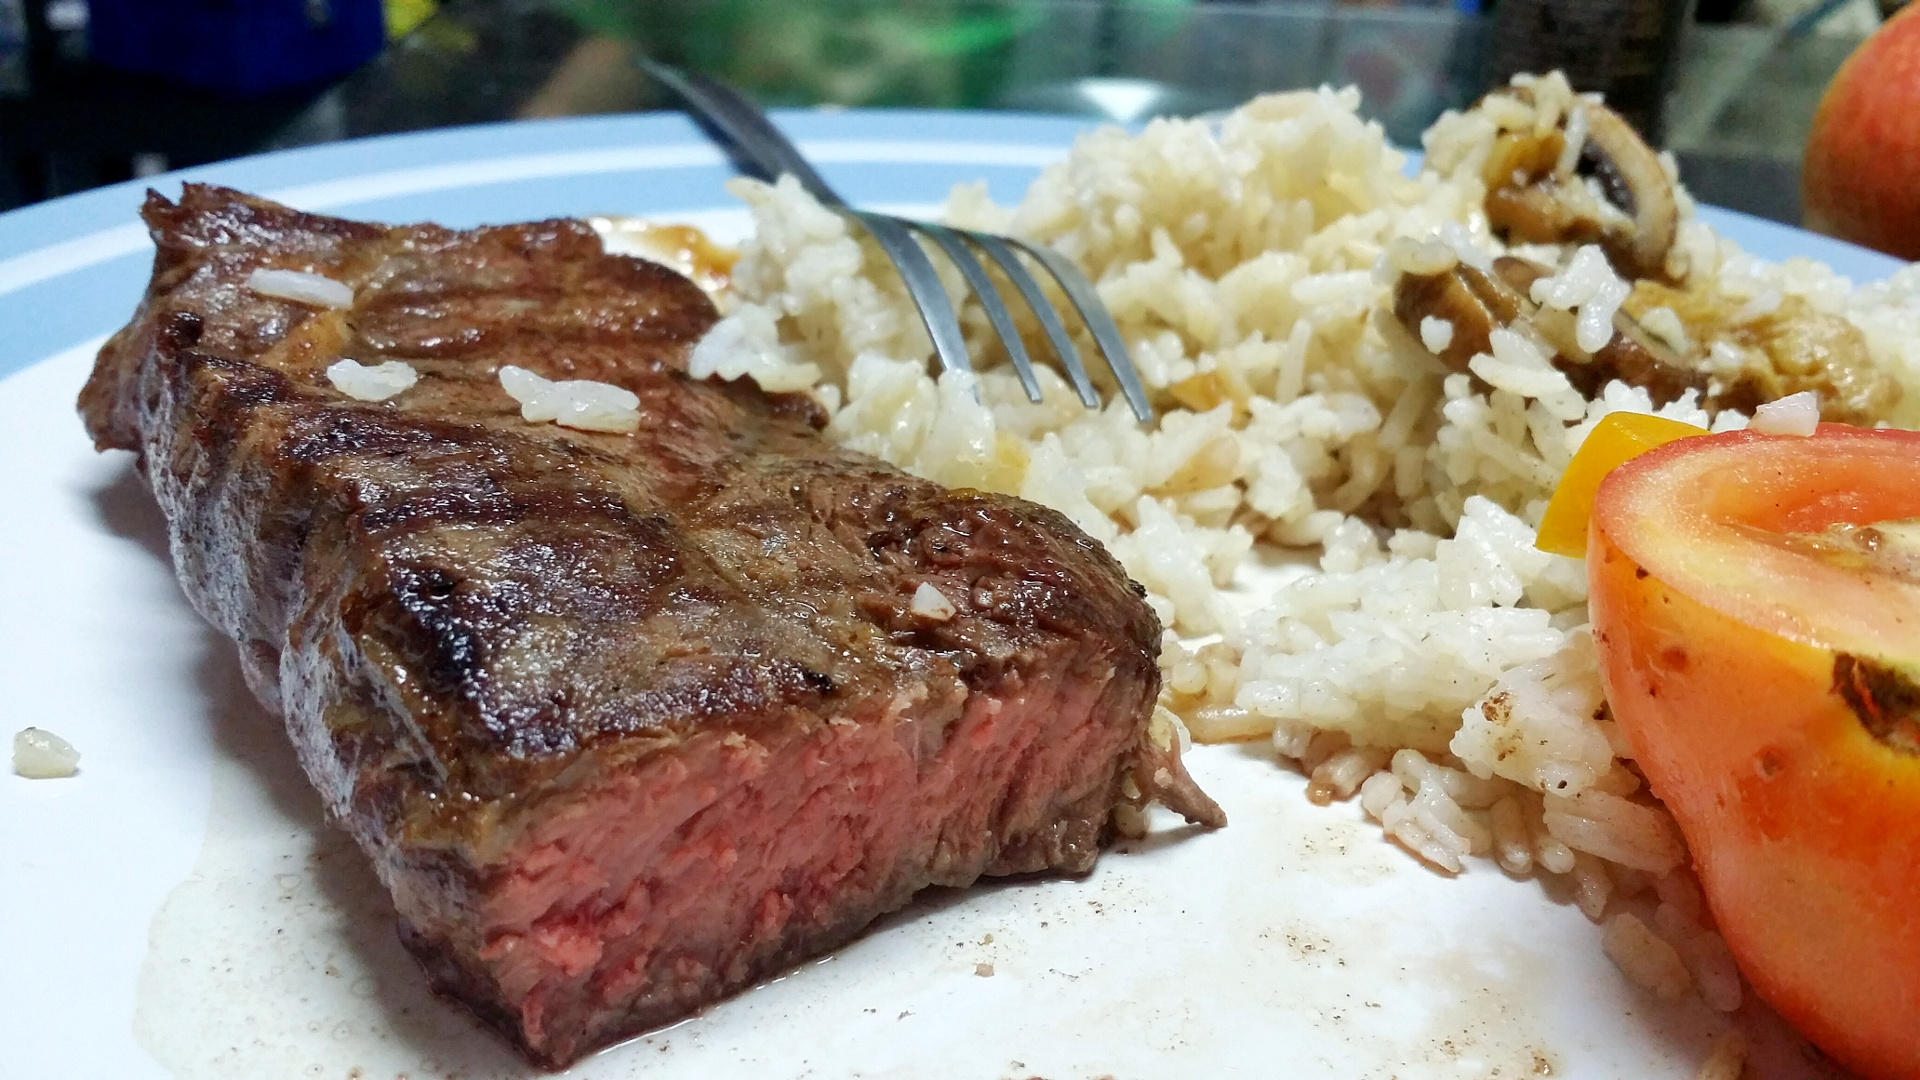
· Medium rare: The steak will have a reddish-pink center. This is the default degree of cooking at most steakhouses when you do not state any doneness level upon ordering.

· Medium: The middle of the steak is hot and fully pink surrounding the center. The outside is grey-brown.

· Medium well done: The meat is lightly pink surrounding the center.

· Well done: The meat is grey-brown in the center and slightly charred.

Additionally, a Chicago-style steak is cooked to the desired level and then quickly charred. The diner orders it by asking for the style followed by the doneness (e.g. “Chicago-style rare”).

image

Grilling

Now that we have learned some basic knowledge about the cuts of meat and the level of cooking for your steak, it is now time to put it on the griller. There are many type of griller out there, but my favourite and most convenient for me is the non-stick grill-pan. It may not be the most authentic grilling experience, but for a simple dinner with your partner at home it is sufficient enough. As always, treat your non-stick pan nice. Clean it with a kitchen wipe gently. If you really need to wash it please don’t scrub it like you would do to a wok. Grilling the perfect steak is an art form; it takes practice and patience to master it, particularly due to the many factors that played-in during the process (eg. temperature, quality of meat). However, with these simple steps you should have no trouble grilling a fantastic steak.

1. Allow your meat to reach room temperature before grilling. This helps grill a steak faster and more evenly.

2. Trim the steak of excess fat. This is the one that lines up the side of the meat, generally white in colour. The reason is, as it cooks, fat shrinks faster than the meat and can cause your steaks to curl.

3. Season. A light brushing of olive oil, some freshly ground black pepper and salt is all you need. Though, the seasoning is entirely up to you. Preheat the grill pan as hot as it will go.

4. Oil the grate of the pan.

5. Grill. Let the steak rest on the pan until it is done before turning the other side. How long that take depends on the thickness of the meat and how done you would like your steak to be (refer chart below). ALWAYS resist the temptation to turn over the steak while grilling to see how done it is because by doing that you would disrupt the momentum of the heat and the timing will run-off and ruin the doneness of the steak.

6. Use pressure test to check the doneness level of the steak. When getting close to having a done steak, press it with your index finger or the flat side of a grilling fork to get a feel for it. A rare steak will be soft. A medium steak will be firm but yielding. A well done steak will be firm.

7. Let the steaks rest for 5 minutes before serving. This will let the juices flow out from the center, redistributing moisture, so the whole steak is nice and juicy.

As a general rule, adhere to the grilling time by meat thickness as mentioned below. Please note that the times are approximate and will vary depending on the type of grill, heat, meat quality and so on. Divide in half the time for each side.

Thickness

1″ : 6-8(Rare), 8-10(Medium),10-14(Well done)

1 1/2″ : 8-10(Rare), 10-12(Medium),12-16(Well done)

2″ : 12-16(Rare), 16-20(Medium), 20-24(Well done)

20150706_193414-01

roasted red snapper

DSC_0005
I learned this dish casually while reading Anthony Bourdain’s Kitchen Confidential. He always stressed that a good quality dish should be simple, only needed at most 4 to 5 ingredients. Finding a fresh fish is crucial. Look for firm fish with bright eyes and red gills. It should smell sweet, not fishy.

olive oil
1 yellow onion, peeled and thinly sliced
2 large cloves of garlic, one peeled and chopped, the other smashed
a stick of butter
a few sprigs of rosemary
1 lemon
a whole red snapper, cleaned, with head and tail intact, scored
1 tomato, quartered
1 whole red chilli, seeds removed and sliced

Preheat your oven at 220 degree C. Rub the fish inside and out with salt and freshly ground black pepper.

In a large sauté pan over medium heat, warm the oil. Add the onions and sauté, stirring occasionally, until softened, about 5 minutes. Add the chopped garlic and sauté, stirring occasionally, for a minute. Add in the butter and let it melt, then squeeze the juice from half the lemon, continue cooking until the mixture is reduced.

Put the snapper in a roasting pan or in a tin foil. Stuff the cavity of the fish with half of the onion mixture, along with the smashed garlic and the rosemary. Spoon the remaining onion mixture over the fish and in the score marks. Add in the tomato and the chilli surrounding the fish. Drizzle some olive oil and squeeze the other half of the lemon juice. Put in the oven and roast for 30-35 minutes, until crispy and thoroughly cooked.

linguine with crab, lemon and chilli

DSC_0196

It is quite imperative to use the freshest, best-quality crab available, to make this dish worthwhile. Otherwise you might as well chuck in a can of tuna flakes and call it a day. Adjust the heat from the chilies and the amount of lemon juice to your liking.

Serves 2
250g linguine
4 tablespoons unsalted butter, divided
2 tablespoons olive oil, divided
1/4 cup minced shallots
2 cloves of garlic, minced
2 red chilies,  seeded, sliced into thin rounds, divide into 2 portions (add more or reduce to adjust the heat)

1 1/2 tablespoons (or more) fresh lemon juice, divided
salt & freshly ground black pepper
200g crab meat, cooked

Cook the pasta according to the packet instruction until al dente. Reserve some of the pasta cooking water.
 
Meanwhile, in a large skillet, melt 1 tablespoon butter with 1 tablespoon olive oil over medium heat. Add shallots and stir until just soft, 3 to 4 minutes. Add garlic and one portion of the chili and cook, stirring often, until fragrant, about 1 minute.

Add 1/2 tablespoon lemon juice and 3 tablespoons pasta cooking liquid; season to taste with salt and pepper. Stir until liquid is reduced; until almost evaporated, about 1 minute.

Stir in the pasta into skillet and add 1/2 cup reserved pasta cooking liquid. Increase heat to medium-high. Toss around the pasta and stir, until liquid is reduced and pasta becomes glossy, about 2 minutes. Add the remaining 3 tablespoons butter, 1 tablespoon oil, 1 tablespoon lemon juice, crab, half of mint, and the rest of the chili.

Stir pasta until butter melts and pasta is well coated, adding more pasta cooking liquid if dry. Serve immediately, and top with a teaspoon of lemon zest if desired.

mushroom quiche

A quiche is basically an open-faced pastry crust with custard filling garnished with any savories that goes well with eggs. Traditional quiche is filled with spinach and mushrooms, but for this variation of the traditional mushroom quiche, i added some leftover roasted chicken from last night. Cheese is the quintessential element in a quiche and good quality Gruyère or Comtè is the normal choice. Again, for this variation, i stick to good old fashion Mozzarella for cost-saving measure, though it is as savory, and enough for my palate. A proper quiche shell must be deep enough to allow you to cook the custard propertly, which is why a traditional 9-inch ring mold is the preferred choice. If the shell is too shallow, you wont have a luxurious enough custard to offer the fundamental pleasure.

Serve 6-8

2 medium shallot, thinly sliced

a  pound of assorted mushroom (shitake, swiss brown, white button, etc.)

1/2 cup of milk

1/2 cup of double cream

3 large eggs

1 1/2 cups of grated Mozarella cheese

salt and freshly ground black pepper

extra virgin olive oil

Prepare the shell by making your basic pie dough. Blind bake the shell and let rest while you prepare the fillings. Heat oil in a large saute pan over medium high heat. Add shallots, and cook, stirring, until translucent but not brown, about 1 minute. Add mushrooms, and season with salt and pepper. Cook, stirring frequently, until mushrooms are dark golden brown, around 8 to 10 minutes.

Sprinkle half the cheese evenly over the bottom of the shell. Spread mushrooms over the cheese and then top with remaining cheese. In a medium bowl, whisk together milk, cream, and eggs. Season with salt, and pepper. Pour over cheese. Transfer to oven, and until 30 to 35 minutes. Cool for about 10 minutes before serving.

classic tray-baked chicken

This dish should be in the repertoire of every home cooks who owns an oven at home. Instead of frying them in oil all the time, which most M’sian does, and with the by-product laced with unhealthy fat and cholestrol, why not tray-bake them? It uses a minimal amount of ingredients – chicken, olive oil, salt and pepper (and if you want gravy, chicken stock) and is especially useful on those busy days when you are just too busy to think of other creative dish to do with with chicken parts. Though it may considerably takes longer than frying, the result is mesmerizing and the aroma is irresistable. The entire kitchen will smells good and your taste palate will be rewarded well.

3-4 pounds of chicken parts (2 breasts, 2 thighs, 2 legs, 2 wings)

extra virgin olive oil

salt and freshly ground black pepper

a whole bulb of garlic, crushed

1/2 cup chicken stock, to make gravy (optional)

2 sprigs of thyme and rosemary (optional)

Preheat oven to 230 degree C.  Rinse chicken pieces in water and pat dry with paper towels.  Coat the bottom of a roasting pan with olive oil.  Rub some olive oil over all of the chicken pieces in the roasting pan.  Sprinkle both sides of the chicken pieces with liberal amount of salt and freshly ground black pepper.  Arrange the pieces skin-side up in the roasting pan so the largest pieces are in the center (the breasts) and there is a little room between pieces so they aren’t crowded in the pan. Chuck in the garlic in the pan and if you prefer to have a wonderful aroma, lay a few sprigs of rosemary and thyme in between the chicken pieces. (I also like to add some tomatoes, quartered, into the roasting pan together with the chicken as i always love roasted tomatoes). Another alternative which resulted in a wonderfully spicy chicken is to rub them with paprika apart from the salt & pepper.

Roast in the oven for at least 30 minutes or until the juices run clear (not pink) when poked with a sharp knife. If your chicken pieces aren’t browning to your satisfaction, you can put them under the broiler for the last 5 minutes of cooking, until browned sufficiently.

Once the chicken is cooked, remove them to a serving plate and let rest for 5 to 10 minutes before serving. This will be a great opportunity to make the gravy. To make gravy for the chicken, take the roasting pan with its drippings and place on a medium setting on the stovetop.  Use a metal spatula to scrape up the drippings stuck to the bottom of the pan.  Add a half cup of chicken stock to the pan to help deglaze the drippings from the pan. Strain the stock and dripping mixture into a small saucepan and heat on medium high to reduce to desired thickness. Add a few spoonful of corn starch to thicken the sauce more if you still feel the sauce is too loose.

spaghetti alla carbonara

The origin of carbonara sauce, as with most other recipes are obscure. Some believe the dish was first made as a hearty meal for Italian charcoal workers, Carbonari, (“charcoalmen”). Whatever the story, carbonara sauce is, to me, one of the basic sauce for pasta (besides alfredo, bolognese, and genovese). One must learn how to make pasta alla carbonara well in order to claim to understanding what Italian dishes are all about. Luscious and wonderfully indulgent, it takes as long to make as it does to cook the pasta.  The fundamental ingredients are simple, just spaghetti (or other long pasta), pancetta or bacon, eggs, Parmesan cheese, a little olive oil, salt and pepper.  Pancetta or bacon is substituted with streaky beef slices so the dish becomes pork-free. A silky sauce is created when the beaten eggs are tossed with the hot pasta and a little fat from the meat.

Serves 4

8 strips of streaky beef, sliced into small strip

3-4 whole eggs

1 cup grated parmesan or pecorino cheese

1 pound spaghetti pasta (or other type of long pasta, such as fettuccine)

Salt and black pepper to taste

extra virgin olive oil

Cook the spaghetti to al dente. In the meantime, heat the olive oil in a large saute pan over medium heat. Add the streaky beef and cook slowly until crispy. Once cooked, turn off the heat and put the beef into a large bowl.

In a small bowl, beat the eggs and mix in about half of the Parmesan cheese. When the pasta is ready, drain and transfer into the bowl with the beef.  Move the pasta from the pot to the bowl quickly, as you want the pasta to be hot. It’s the heat of the pasta that will cook eggs sufficiently to create a creamy sauce. Toss everything to combine, then add the beaten eggs with cheese and toss quickly to combine once more. Season to taste, and serve at once with the rest of the parmesan.

roasted tomato soup

There are many variations on how to prepare tomato soup, and by far, this is my most favourite and the easiest with the least ingredients. I love serving this with baguette, the crunchy outer texture compliments the rustic taste of the soup.

Serves 4

1kg ripe cherry tomatoes

4 large tomatoes

4 cloves of garlic

4 tablespoons balsamic vinegar

2 small red onions

a small bunch of fresh basil

extra virgin olive oil

salt and freshly ground black pepper

Prepare a medium roasting tray. Preheat oven to 220 degree C. Quarter the large tomatoes and together with the cherry tomatoes, put all into the roasting tray. Drizzle over a good lug of olive oil season with salt and pepper. Crush and peeled the garlic and toss into the roasting tray. Put in the oven for 12 to 15 minutes.

In the meantime, peel and roughly chop the onions and put in a hot saucepan with a few lug of olive oil and a pinch of salt. Sweat the onion for a few minutes without browning over low heat. Stir the balsamic vinegar, turn up the heat to medium and let it cook away and reduce down. Take the tray of tomatoes out of the oven and add everything into the pan of onion.

Carefully pour everything into a blender, add the basil (reserves some for garnishing) and whizz to a fairly rustic consistency. Serve in a bowl, optionally topped with freshly grated Parmesan cheese, drizzle of extra virgin olive oil and the reserved basil.