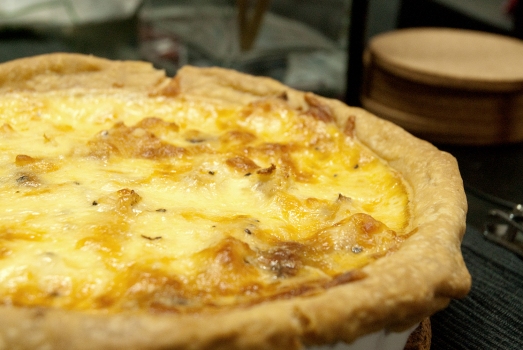
mushroom quiche

A quiche is basically an open-faced pastry crust with custard filling garnished with any savories that goes well with eggs. Traditional quiche is filled with spinach and mushrooms, but for this variation of the traditional mushroom quiche, i added some leftover roasted chicken from last night. Cheese is the quintessential element in a quiche and good quality Gruyère or Comtè is the normal choice. Again, for this variation, i stick to good old fashion Mozzarella for cost-saving measure, though it is as savory, and enough for my palate. A proper quiche shell must be deep enough to allow you to cook the custard propertly, which is why a traditional 9-inch ring mold is the preferred choice. If the shell is too shallow, you wont have a luxurious enough custard to offer the fundamental pleasure.

Serve 6-8

2 medium shallot, thinly sliced

a  pound of assorted mushroom (shitake, swiss brown, white button, etc.)

1/2 cup of milk

1/2 cup of double cream

3 large eggs

1 1/2 cups of grated Mozarella cheese

salt and freshly ground black pepper

extra virgin olive oil

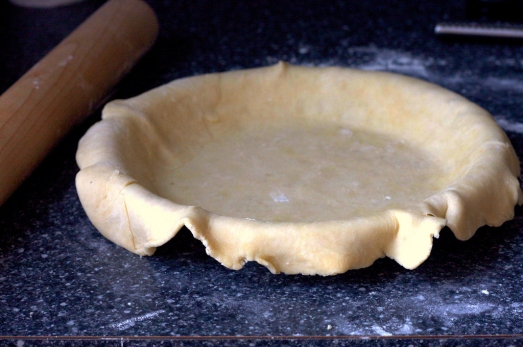
Prepare the shell by making your basic pie dough. Blind bake the shell and let rest while you prepare the fillings. Heat oil in a large saute pan over medium high heat. Add shallots, and cook, stirring, until translucent but not brown, about 1 minute. Add mushrooms, and season with salt and pepper. Cook, stirring frequently, until mushrooms are dark golden brown, around 8 to 10 minutes.

Sprinkle half the cheese evenly over the bottom of the shell. Spread mushrooms over the cheese and then top with remaining cheese. In a medium bowl, whisk together milk, cream, and eggs. Season with salt, and pepper. Pour over cheese. Transfer to oven, and until 30 to 35 minutes. Cool for about 10 minutes before serving.

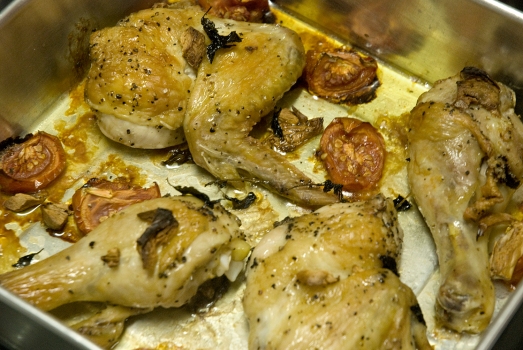
classic tray-baked chicken

This dish should be in the repertoire of every home cooks who owns an oven at home. Instead of frying them in oil all the time, which most M’sian does, and with the by-product laced with unhealthy fat and cholestrol, why not tray-bake them? It uses a minimal amount of ingredients – chicken, olive oil, salt and pepper (and if you want gravy, chicken stock) and is especially useful on those busy days when you are just too busy to think of other creative dish to do with with chicken parts. Though it may considerably takes longer than frying, the result is mesmerizing and the aroma is irresistable. The entire kitchen will smells good and your taste palate will be rewarded well.

3-4 pounds of chicken parts (2 breasts, 2 thighs, 2 legs, 2 wings)

extra virgin olive oil

salt and freshly ground black pepper

a whole bulb of garlic, crushed

1/2 cup chicken stock, to make gravy (optional)

2 sprigs of thyme and rosemary (optional)

Preheat oven to 230 degree C.  Rinse chicken pieces in water and pat dry with paper towels.  Coat the bottom of a roasting pan with olive oil.  Rub some olive oil over all of the chicken pieces in the roasting pan.  Sprinkle both sides of the chicken pieces with liberal amount of salt and freshly ground black pepper.  Arrange the pieces skin-side up in the roasting pan so the largest pieces are in the center (the breasts) and there is a little room between pieces so they aren’t crowded in the pan. Chuck in the garlic in the pan and if you prefer to have a wonderful aroma, lay a few sprigs of rosemary and thyme in between the chicken pieces. (I also like to add some tomatoes, quartered, into the roasting pan together with the chicken as i always love roasted tomatoes). Another alternative which resulted in a wonderfully spicy chicken is to rub them with paprika apart from the salt & pepper.

Roast in the oven for at least 30 minutes or until the juices run clear (not pink) when poked with a sharp knife. If your chicken pieces aren’t browning to your satisfaction, you can put them under the broiler for the last 5 minutes of cooking, until browned sufficiently.

Once the chicken is cooked, remove them to a serving plate and let rest for 5 to 10 minutes before serving. This will be a great opportunity to make the gravy. To make gravy for the chicken, take the roasting pan with its drippings and place on a medium setting on the stovetop.  Use a metal spatula to scrape up the drippings stuck to the bottom of the pan.  Add a half cup of chicken stock to the pan to help deglaze the drippings from the pan. Strain the stock and dripping mixture into a small saucepan and heat on medium high to reduce to desired thickness. Add a few spoonful of corn starch to thicken the sauce more if you still feel the sauce is too loose.

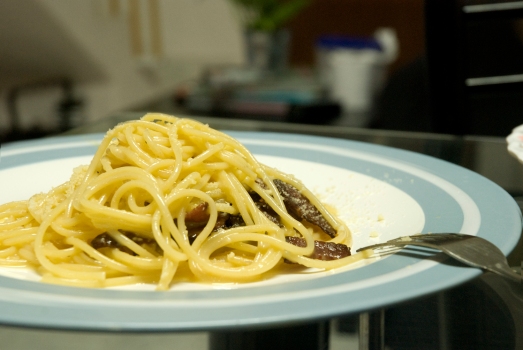
spaghetti alla carbonara

The origin of carbonara sauce, as with most other recipes are obscure. Some believe the dish was first made as a hearty meal for Italian charcoal workers, Carbonari, (“charcoalmen”). Whatever the story, carbonara sauce is, to me, one of the basic sauce for pasta (besides alfredo, bolognese, and genovese). One must learn how to make pasta alla carbonara well in order to claim to understanding what Italian dishes are all about. Luscious and wonderfully indulgent, it takes as long to make as it does to cook the pasta.  The fundamental ingredients are simple, just spaghetti (or other long pasta), pancetta or bacon, eggs, Parmesan cheese, a little olive oil, salt and pepper.  Pancetta or bacon is substituted with streaky beef slices so the dish becomes pork-free. A silky sauce is created when the beaten eggs are tossed with the hot pasta and a little fat from the meat.

Serves 4

8 strips of streaky beef, sliced into small strip

3-4 whole eggs

1 cup grated parmesan or pecorino cheese

1 pound spaghetti pasta (or other type of long pasta, such as fettuccine)

Salt and black pepper to taste

extra virgin olive oil

Cook the spaghetti to al dente. In the meantime, heat the olive oil in a large saute pan over medium heat. Add the streaky beef and cook slowly until crispy. Once cooked, turn off the heat and put the beef into a large bowl.

In a small bowl, beat the eggs and mix in about half of the Parmesan cheese. When the pasta is ready, drain and transfer into the bowl with the beef.  Move the pasta from the pot to the bowl quickly, as you want the pasta to be hot. It’s the heat of the pasta that will cook eggs sufficiently to create a creamy sauce. Toss everything to combine, then add the beaten eggs with cheese and toss quickly to combine once more. Season to taste, and serve at once with the rest of the parmesan.

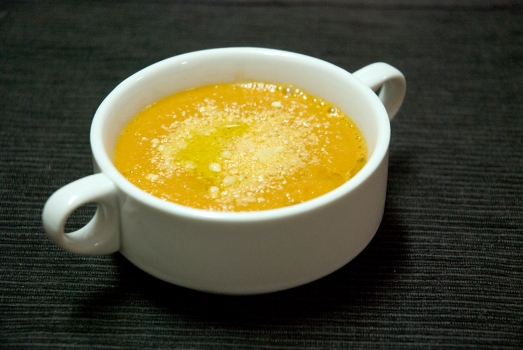
roasted tomato soup

There are many variations on how to prepare tomato soup, and by far, this is my most favourite and the easiest with the least ingredients. I love serving this with baguette, the crunchy outer texture compliments the rustic taste of the soup.

Serves 4

1kg ripe cherry tomatoes

4 large tomatoes

4 cloves of garlic

4 tablespoons balsamic vinegar

2 small red onions

a small bunch of fresh basil

extra virgin olive oil

salt and freshly ground black pepper

Prepare a medium roasting tray. Preheat oven to 220 degree C. Quarter the large tomatoes and together with the cherry tomatoes, put all into the roasting tray. Drizzle over a good lug of olive oil season with salt and pepper. Crush and peeled the garlic and toss into the roasting tray. Put in the oven for 12 to 15 minutes.

In the meantime, peel and roughly chop the onions and put in a hot saucepan with a few lug of olive oil and a pinch of salt. Sweat the onion for a few minutes without browning over low heat. Stir the balsamic vinegar, turn up the heat to medium and let it cook away and reduce down. Take the tray of tomatoes out of the oven and add everything into the pan of onion.

Carefully pour everything into a blender, add the basil (reserves some for garnishing) and whizz to a fairly rustic consistency. Serve in a bowl, optionally topped with freshly grated Parmesan cheese, drizzle of extra virgin olive oil and the reserved basil.

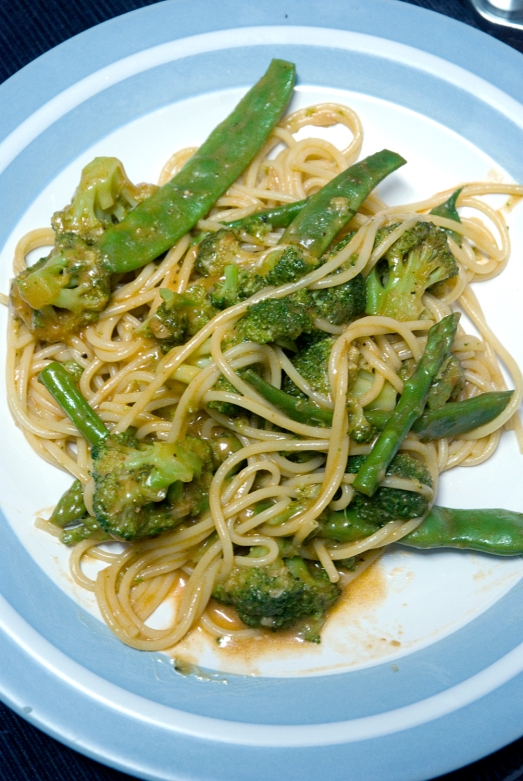
pasta alla primavera


This Italian phrase, primavera [pree-muh-VEHR-uh]  means “spring style” and refers to the use of fresh vegetables (raw or blanched) as a garnish to various dishes. The origin of the dish is traced back to New York, where the chefs at Le Cirque restaurant came up with a riot of vegetation doused in butter, cream and lots of parmesan cheese. This version is a lightened and simplified rendition of this classic, but still captures the spirit of the 70’s and 80’s high style dining fashion. The dish may contain almost any kind of vegetable, but firm and crisp vegetables, such as broccoli, carrots, peas, onions, and green bell peppers with tomatoes are the usual preference. Classic primavera sauce is based on a soffrito (the sweating of vegetables in low heat without browning) of garlic and olive oil and finished with Parmesan cheese. Further versions, such as this one is based on a heavier cream or Alfredo style sauce.

Serves 4

1/2 pound spaghetti

a small bunch broccoli, about 1 heaping cup of florets

1 small zucchini, diced

4 asparagus’ spears

1/2 cup snow peas/honey beans

3 minced garlic cloves

2 tablespoons tomato paste

a bunch of basil leaves, chopped

4 tablespoons butter

1/4 cup chicken/vegetable broth

1/2 cup heavy cream

a handful of freshly grated parmesan cheese

Salt and freshly ground black pepper

Cook the pasta to al dente. Bring a large pot of water to boil and salt it well. It should taste like the sea. In the meantime, fill a large bowl with ice water to prepare the waterbath.  Boil the broccoli for 1 minute. Add the asparagus and boil another minute. Add the snow peas/honey beans and boil for 30 more seconds. Remove all the vegetables and plunge them into the ice water. Once they’re cool, drain in a colander.

If you want, you can boil your pasta in the same pot you boiled the vegetables in, or you can start over and boil new water. In a large saute pan, heat the butter over medium-high heat.  When the butter melts, add the garlic and zucchini and cook for a minute. Add the tomato paste and cook for another 2 minutes. Pour in the chicken/vegetable broth and turn the heat to high to bring it to a boil. Add the cream and toss in all the vegetables you boiled. Stir to combine. Turn the heat down until the cream-chicken broth mixture is just simmering, then add the parmesan cheese and stir again to combine. If the sauce seems too thick add some more of the broth.

As soon as the pasta is done, drain and transfer it into the sauce and stir to combine. Add the basil and season to taste. Serve immediately.


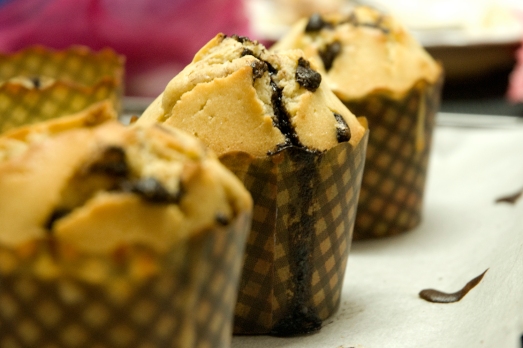
muffin

Muffins are essentially flavored pancake batter; they can be sweet or savory, and garnishes with berries, diced fruit or vegetables, nuts, spices—are limited only by your imagination. They’re so easy to make i wonder why should one ever need to buy them in bakery shops whenever we crave for them. You could basically think of a muffin you desires and by an hour you would already be munching them.

The golden rule to making muffin is understanding the ration of flour-liquid-egg. The rest is garnishing variations and sweet factor. The most basic and solid ratio for muffin is 2-2-1-1, that is 2 parts flour, 2 parts liquid (milk), and one part egg and butter each, while leavening is achieved by baking powder. As a rule of thumb, a teaspoon of 4 ounces flour. Increase the amount when you increase the volume of the flour when you’re making larger batch.
Another variable is sweetness. Most muffins preparations are sweet. But the type of muffin you’re making should determine the level of sweetness. If you have a lot of sweet garnish, banana for instance, or if your muffin is to be served with a very sweet accompaniment, you might want your batter somewhat less sweet. But another good rule of thumb for muffins is to add as much sugar as butter.
Makes 10 muffins

8 ounces flour

4 ounces sugar

1 teaspoon salt

2 teaspoons baking powder

8 ounces milk

4 ounces eggs (2 large eggs)

4 ounces butter, melted

Preheat your oven to 350°F.

Combine the flour, sugar, salt, and baking powder. In a bowl, combine the milk, eggs, and butter. With a whisk or a hand blender, whisk or blend the mixture until the eggs are uniformly distributed. Add the dry ingredients. Whisk just to combine. If you’re adding additional garnish, such as citrus zest or fruit, do so now.

Pour the batter into muffin tins or a loaf pan (butter the pan first). Bake for about 30 minutes, or as much as 50 minutes for a loaf, until the blade of a paring knife inserted in the center comes out clean.

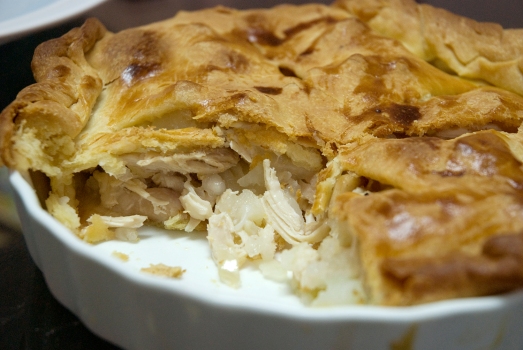
rustic chicken pie

Whenever i made roasted chicken the night before, i’ve always use the leftover to make this pie. It’s a simple pie, the filling is nothing more than shredded chicken breast (as the breast is my least favourite part), potatoes, and some vegetables. If i have some, i’d also include chicken sausages and they tasted fantastic. Apart from being quick, simple and scrumptuos, the puff pastry gives you a really rusty crispy top, which i can never get enough of.

Serves 4

leftover roastec chicken meat, shredded

2 knobs of butter

1 medium onion, finely sliced

2 sticks of celery, finely sliced

2 Russet potatoes, peeled

a litre of chicken stock

Preheat oven to 220 degree C. Take a medium caserole pot and add a lug of olive oil and butter. Add the chicken, celery, onion and cook for 15 minutes. Bring a pot of salted water to boil. Cut the potatoes into small cubes and boil in the pot for 10 minutes. Drain the potatoes and transfer into the caserole pot. Add the chicken stock and simmer slowly for another 30 minutes.

Prepare your pie dough. Lay the dough on a 9-inch pie pan. Pour the chicken mixture into the pan and drape the top with another layer of the dough. Trim the edges, egg-wash the top and make a few holes by scoring mark on the top to allow steam to escape while baking. Put inside the oven and bake for 40 minutes, or until golden on top.

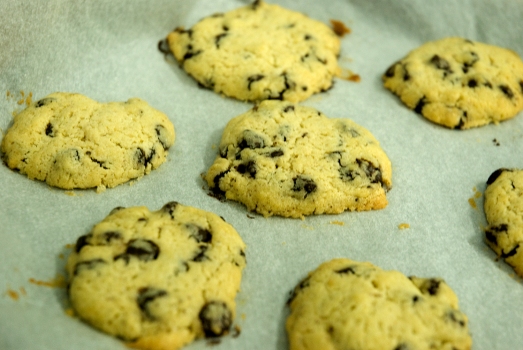
chocolate chip cookies


When it comes to chocolate chip cookies, there are hundreds of variation and ways to prepare them. In the end, chocolate chip cookies are chocolate chip cookies whatever thevariations. What i picked up from Michael Ruhlman is the most basic, easiest way of how to make them, and as he noted, will not give you art or the best chocolate chip cookie ever made, not ever close to that of the closely guarded secret of Famous Amous, but it will give you a good solid cookie. This recipe calls for equal parts butter, sugar, and flour, so has a very high proportion of fat, which will cause them to spread considerably and result in a very thin crisp chocolate chip cookie. If you prefer your cookies crisper, simply reduce the amount if butter to half.

8 ounces unsalted butter (2 sticks)

4 ounces white sugar (about ½ cup)

4 ounces brown sugar (about ½ cup)

1 large egg

1 teaspoon vanilla extract

½ teaspoon salt

8 ounces flour (about 1 ½ cups)

1 teaspoon baking powder

1 cup chocolate chips or chopped chocolate

Preheat your oven to 180 degree C.

Combine the butter, sugars, egg, and vanilla and mix thoroughly in a standing mixer using the paddle attachment or by hand. Combine the remaining ingredients except the chocolate and fold them into the dough. Fold the chocolate into the dough.

Drop heaping tablespoons onto a baking sheet. Give them some room because they’ll spread. Bake for 10 minutes or until the edges begin to darken.

pie dough (Pâte Brisée)

Pie dough or Pâte Brisée (PA-TAY BREE-SAY) is your standard pastry kitchen 101, everyone (at least those who owns an oven) should know how to make it. This is your basic dough, from it variations are made to transform them into other shell such as tarts. It is so easy to prepare, even after only a few tries one should be able to make them with both eyes closed! Pie dough is best made by hand since it results in a delicate crust. But if you’re making a big batch then a stand mixer should lessen the burden. All you need to know by heart is the ratio of flour:fat:water, which is 3:2:1. That is why when you go to culinary school, they always refer its name as 3-2-1 pie dough. Understanding the ratio will make you golden and escape the wrangle of pie/tart recipes. Simply increase or decrease the amount of ingredients using the ratio.  Then insert the filling, whatever you desire. The important factor is the choice of fat. I prefer butter to lard or vegetable shortening since butter is flavorable. Use salted butter will lessen the use of salt to season it, using unsalted will lessen need more salt to taste. I prefer to measure the volume of flour-fat-water by weigh instead of volume. This is because the content of flour differs according to temperature.

Variation to pie dough is its counterpart known as Pâte Sucrée, which includes sugar, for sweet dough use for tart shells. To cover a standard 9-inch pie pan, 12 ounces of flour is sufficiently enough, about 2 1/4 cups. Thus follows 8 ounces of butter and 4 ounces of cold water. Create a flaky pie crust by multiplying the layers of dough separated by fat (butter/lard/shortening). The other important factor is tenderness – crusts will be dense and tough if you overwork the dough. When water is added, mix the dough gently and just until the combine together, then wrap in plastic and refrigerate for at least 30 minutes or until ready to be rolled.

To cover a 9-inch pie pan (with top)

12 ounces flour

8 ounces butter

2 to 4 ounces cold water

Combine the flour and butter in a mixing bowl and rub the butter to create small beads of fat and plenty of pea-sized chunks for a flaky crust. Add the ice water gradually and a good pinch of salt and mix gently, just until combined. Shape the dough into 2 equal disks and refrigerate for at least 30 minutes or until ready to be rolled.

Blind baking: We “blind” bake a dough especially for fruit tarts when we are not required to bake the filling of the tart. To do so, we need to fill the shell with something heavy to prevent the crust from buckling. Pie weights are made specially for this purpose but a layer of baking sheet lining the pan with a pound of dried beans on top does the same job well. Bake in oven for 20 to 25 minutes at 160-180 degree C, then remove the weight and continue cooking in the oven until the crust is golden brown and cooked through.

strawberry meringue tart

I picked-up a great technique to judge the doneness of a meringue from Jamie Oliver. Whisk the egg whites to the point that when you hold the bowl upside down on your head, the mixture does not pour over you! This is a lovely dessert which can be made with any fruit combination you fancy.

Pastry for 9-inch tart shell

9 ounces flour

6 ounces butter

2 to 3 ounces ice water

1 egg yolk

a pinch of salt

1/2 cup of sugar (omit if you prefer unsweetened tart)

Filling

3 cups quartered strawberries

1 cup sugar

1 tablespoon lemon juice

1/2 cup plus 2 tablespoon water

3 tablespoons cornstarch

Meringue

5 large egg whites

1 teaspoon lemon juice

1/2 cup sugar

To make the tart shell: Combine the flour, butter and sugar in a mixing bowl and rub the butter between your fingers until they form small pea-sized bead chunks. Add the egg yolk, salt and water and whisk until they just combined. Shape the dough into a log, wrap in plastic and chill at least 30 minutes in the refridgerator. On a lightly floured surface, roll out the dough to just under 1/4 inch thick and line a 9 inch tart shells. Trim, and “blind” bake in oven for 15-20 minutes over 180 degree C. (To blind bake, line the pastry shell with a baking sheet and fill the pastry with dried beans. The reason for this is to prevent the crust from buckling.)

To make the filling: Stir strawberries with sugar, lemon juice and the 1/2 cup of water in a bowl and let sit for 20 minutes. Strain the liquid into a small saucepan, heat up to a simmer and stir in the cornstarch and the balance 2 tablespoons water while whisking. Stir until thickened, then remove from heat to cool. Once cooled, fold the liquid back into the strawberries and pour the whole thing into the baked tart shell. Chill in refridgerator while preparing the meringue.

To make the meringue: Whisk the egg whites to a soft peak (if you prefer not to have stiff arms, use a standing mixer). Add the sugar and whisk in. Adjust the sweetness according to your preference by adding a bit more sugar if necessary.

Assembly: Fold the filling into the baked tart shell, then dollop the meringue on top and peak it with a fork so it’s not all smooth and flat. Bake in oven oven 200 degree C for 2-3 minutes until the meringue is lightly golden. Serve hot or cold.