perfect roasted chicken

There are three finese points to a perfect chicken. Though there are many variables that make one roasted chicken different from another, only three key components are essential to ensure you end up with the perfect roasted chicken: 1) Seasoning, 2) oven temperature and 3) the maintenance of juicy breast and fully cooked thighs. Seasoning in this case is salt. A chicken should be liberally salted. It should have a visible coating of salt. An agressive use of salt ensure the chicken tastes delicious. It also helps dehydrate the skin so that you wind up with a crisp brown skin and not a pale soggy one.

Chicken should be roasted in a very hot oven, at least 220 degree C, where it should accomplish two important jobs: browns the skin and cooks the leg and thigh fast, giving the breast less opportunity to dry out. The most common mistake people made that they ended up with flavorless breast is that they fail to understand what is happening in the cavity of the bird. If the leg is not tied up, or the cavity is left empty, hot air swirls around the cavity of the bird, cooking the breast from the inside out. To prevent this, you should truss the chicken (binding the legs together), which most home cooks don’t bother with. If you don’t, simply stuff the cavity with something, lemon, onion, garlic or herbs, where my preferrence is lemon.

To prevent overcooking your chicken, a 1 hour at temperature of 230 degree C is sufficient enough for a 4-pound/1.8kg bird (50 minutes for a bird under that). But as a rule of thumb, use the cavity juices to judge doneness. After 45 minutes, if you tilt the bird so the juices spill from the cavity into the rendered fat are clear instead of red in color, it is then safe to take the bird out of the oven. Once done, the chicken should be rested for a good 15 minutes before you cut into it. The bird wont get cold i promised you, since they would still be cooking internally once you’ve taken it out of the oven.

(Good enough to) serve 4

One 3 to 4 pound/1.4 to 1.8 kg chicken

1 lemon

a whole bulb of garlic

salt and freshly ground black pepper

3 to 4 pound/1.5 to 2 kg of Russet potatoes, peeled.

About an hour before cooking time, salt the chicken entirely with salt and pepper (salting the bird hours earlier in advance will result in the skin being smooth shiny and golden instead of being crispy) . Cut the potatoes to the size of a golf ball. Bring a pot of water to boil and boil the lemon, potatoes and garlic for about 10 minutes. Drain in a colander, prick the lemon a few times to let off the steam. Stuff the lemon and garlic into the cavity of the bird. Truss the chicken well. Sit the chicken inside a roasting tray just big enough to ensure the bird fit snugly. Add in the potatoes around the chicken and drizzle a good amount of olive oil so it coats the potatoes well. Slide the tray into the oven and cook for about an hour. Check the color of the juice, if it runs red, give it more time in the oven.

Remove the chicken from the oven and let rest for 15 minutes. Carve the chicken and serve with any sauces of your choice.
the twenty techniques: #5) Butter

If ever there is a magical ingredient in a kitchen, my pick is butter. Butter is a mystical gift from the cow which makes almost everything taste better. Butter is the most useful and most common fat for cooking and eating, and understanding how to use it makes you a better cook. Fat is good. Fat does not make us fat (eating too much does). Fat is what makes a food flavorful. I suspect that most home cook does not use butter enough. Most of us only associate butter to baking cakes/cookies. We do not truly understand how truly valuable it is.

Thinking about butter allows us to see it, and use it, as a tool. It shortens the dough that will hold your pie filling or form the cookie you baked. It enriches a sponge cake and also becomes part of the frosting on that cake. It cooks and flavors the meat in your roasting pan/tray. Basting the meat with butter simultaneously helps the meat cook and flavors it, then enriches the pan sauce you later make for the meat. The solids in butter take on extraordinary flavors when gently browned. Butter by itself is a ready-made sauce—you use it with pasta, with your steak, with a roast chicken. Add aromatics, such as a little shallot and lemon, and it becomes a more complex sauce. Knead some flour into butter, and the mixture becomes the perfect thickener for sauce. A pastry kitchen ceased to exist without butter. As my mentor and celebrity chef Anthony Bourdain puts it, “In a professional kitchen, it’s almost always the first and last thing in a pan.” Butter is a great cooking medium, flavoring and giving color to sautes. Added at the end, it completes a dish, making it more luscious, and it smoothes out the texture and flavor of the finished sauce.

Butter as cooking medium
Raising heat to a butter melts it. The higher the heat the water in the butter cooks off more rapidly. Once that happens, the butter solids browned and coloring and flavoring the food you cook it with. The only thing to do once this happens is to make sure the solids don’t burn. Basting, spooning butter over what you’re cooking, does two things: it flavors the food with the butter fat and the browning butter solids, and it cooks the food from the top down while the hot pan cooks it from the bottom up. For sauteing fish, chicken and beef at hot temperature (try it istead of using oil), use clarified butter. Butter can be clarified by melting the butter over low heat, the solids will rise to the top and are spooned away as the water cooks off until all you are left with is pure butter fat. Poaching is another technique which is wonderful when using butter. Butter is whisked into a bit of water and melted. This dense, flavorful medium cooks food very gently and is thus well suited to cooking ingredients that need gentle heat such prawns/shrimps.

Butter as shortener
If you always wonder why they called it shortener, it’s because they shorten the strands of gluten in the flour which results in tender crumb when you bake the flour mixture, which you want in a pastry crust. Without shortener, they becomes chewy like a bread. Butter is an excellent shortener compared to vegetables shortening or lard, because of the flavor. Try making a pie with both using butter and vegetable shortening and taste the different. Whenever a recipe for pastry calls for vegetables shortening, i always use butter instead. (As butter encourages the formation of gluten, do not knead your pastry too much or it’ll end up too chewy.)

Butter as enricher, thickener and finisher
Most hot, stock-based sauces are improved when you finish them by swirling in a little butter just before serving. This is called mounting a sauce with butter. The butter smoothes out the texture of the sauce, making it more voluptuous and satisfying. It’s a terrific way to enrich a sauce while improving its texture.

Butter as garnish
Using compund butter is a teriffic way to garnish most grilled/barbecued or roasted meats and fish. Simple to make, it can be varied according to your whim. Let the butter soften, then mix in aromatics, fresh herbs, minced shallot, or lemon, rolled into a log using plastic wrap/cling film, then is sliced and placed atop hot meat or fish, over which it will slowly melts. This is a standard practise for most hotel restaurants and it’s a great technique to enhance home cooked dishes.

Salted, or unsalted butter? It’s a matter of preferrence actually. Butter was salted to preserve it, now it’s more because of flavoring. If you do not want too much salt in your cooking and you want greater control of the amout of salt you’re using (especially when making pastry) use unsalted butter. I prefer using salted, due to the flavor and because unsalted butter generally cost more here. What is more important is the quality of the butter. You’ll normally get what you pay, so make your choice well.

The story of fat
Butter is fat, so is oil. When you’re cooking your food, take a spoonful to taste and think. Apart from correcting the seasoning with salt and pepper, and evaluating the acidity, whether you need to add a bit more vinegar/lemon juice, ask yourself if you have the depth of texture and satisfying nature that I’m after? If not, fat may be the solution. Butter is the most common finishing fat used. So does oil. Determine the kind of fat you may requires. Your choice of fat makes a difference in the finished dish. Use butter in a pie will result in rich and flavorful pie crust, use vegetable shortening and your flavor is neutral. Extra-virgin olive oil would be ruined in a hot saute pan. Use it cold or warm for its elegant flavor. So choose your fat according to the results you want.

pan-roasted chicken breast

Pan roasting is a wonderful technique that should have been the repertoire of every home cook. Pan roast is simply the combination of two dry heat technique: saute and roast. The chicken breast is first seared in a pan over the stove top and then is turned and put in the oven to finish the cooking. The result is a browned exterior with a developed flavor while the interior is tender. What so great about the technique is that i always finish the cooking of the meat together with my choice of vegetables to be roasted together, that way, i could develop the flavor of the meat to incorporate the taste of the vegetables.

Serves 4

4 x 180g of boneless chicken breast

a knob of butter

300g cherry tomatoes and 4 large tomatoes

a couple of sprigs of rosemary

1 lemon

dried oregano

salt and freshly ground black pepper

extra virgin olive oil

Preheat your oven at 200 degree C. Season the chicken breast with salt and pepper. Rub some olive oil over the meat and coat with the dried oregano. Leave to rest for at least 10 minutes. Heat a frying pan with a lug of olive oil, melt the butter, and saute the chicken breast for 4 to 5 minutes, or until golden on both sides. Get a nice roasting tray, quarter the lemon and the large tomatoes and chuck into the tray. Add the cherry tomatoes into the tray too. Put the chicken breast inside the tray and lay the rosemary sprigs on top of the breast. Squezed some lemon juice over the breat for flavor, and finally pop the tray into the oven and roast for 15 – 20 minutes, depending on the size of the breast.

jacket potato

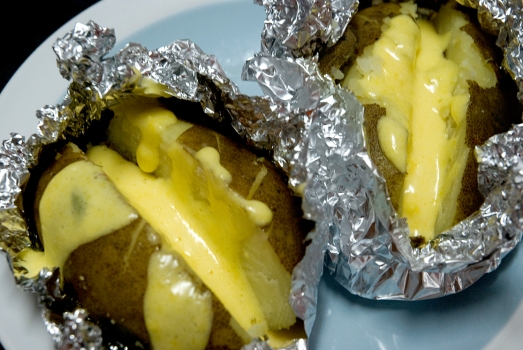
There’s nothing better when you’re hungry than a hot, steaming, fluffy jacket potato. Even simply served with a knob of butter, or a drizzle of olive oil, or maybe with sour cream and some salt and pepper, it is one of the most comforting things to eat. The beauty of them is that they can be topped with some amazing combinations. When it comes to jacket potato, i’ve always use Russet potato, which is more suitable for baking compared to other type of potatoes. I’ve always ensure that my pantry is fully stocked, sometimes when i have nothing to do and some cravings, i turn to jacket potato. It also serves as a good snack, day and night, and also a good pairing with any main dishes for dinner.

To bake your potatoes, wash the potatoes well, dry them and prick several times with a fork/knife. This is to allow steam to escape during the baking process and avoid the potatoes from exploding in your oven. Pour some olive oil into your hands and rub over the potatoes, then scatter over some salt which should stick to the oil. Place directly on the shelf in the oven and bake on 220 degree C for 1 to 1½ hours, depending on the size of the potato. I personally prefer to wrap the potatoes in aluminium foil before baking which will help to retain moisture, while leaving it unwrapped will result in a crisp skin. When cooked, the potato should be golden-brown and crisp on the outside and give a little when squeezed. Split open to potato and serve with some of my favourite toppings:

Hollandaise sauce: personally my most favourite. Learn how to prepare hollandaise sauce here.

Three cheeses with chives: grate over some Parmesan, Cheddar and crumbled Feta. Sprinkle over some finely chopped chives.

Prawns: dress your prawns with mayonnaise. Lovely!

Smoked salmon and sour cream: when you split open the potatoes, make quite a large well in the centre and add the smoked salmon with sour cream, dress lightly with lemon juice.

Mozzarella and basil:torn-up some mozzarella ball into pieces, a little squeeze of lemon juice and some fresh whole basil leaves, a drizzle of olive oil and some salt and pepper.

the twenty techniques: #4) Onion

Onion is chef’s or any cook’s secret weapon. Onion is among the most powerful flavoring devices in the kitchen but because onions are abundant and cheap, they, like salt and water, tend to be overlooked for what they are: a miracle ingredient that transforms food in many ways, in nearly every style of cuisine around the world. Every time i do my grocery i would buy onion, some sort of a fetish, because i have a fear to not have them when i need them.

Onion is unique compared to other ingredients in an interesting way: it behave differently to different ways one might use them. Think about it for a second, onions are not a one-note ingredient like, say, lemon juice. Lemon juice is lemon juice. Add more, or add less, heat up, cool down and it’s always lemon juice. Onion has sort of a control by how much heat you bring to it, and for how long, before you add the other ingredients it will support. Used raw, onions have one effect on a soup or sauce or stock; lightly cooked but not browned, another effect; cooked for a long time but still without color, still another effect; taken further and browned, still another. Poach onions, and they’re different again. Roast them, and they’re a unique preparation. Macerate onions in vinegar, and you have yet another effect.
Onions add both sweetness and savouriness, a satisfying depth of flavor—in varying degrees depending on how you heat them. I remembered as a child i detested onion, i would always tried to separate them before eating any dishes that incorporate them. Now, i can’t be separated from my onions whenever i cook.

As describe by Michael Ruhlman, in terms of onion as tool/technique, there are three main subjects to recognize: the workhorse onion itself, sweating, and caramelizing.

The workhorse Onion
The basic white and yellow storage onion is your workhorse onion, the onion you should always have on hand. When you shop, you should look at the quality of the onion rather than seek out a specific type, look for those with furm bulbs and tight dry skin. I always like my onions big, that way i don’t waste time peeling them. If only a portion is used, i would wrapped the leftover before storing in the refridgerator.

Sweating
Sweating (to release water to the surface if the onion into small beads, using heat) is a technique to gently heat the onion in a small amount of oil or butter without browning it. As the onion loses water, its flavors begin to concentrate, and the heat transforms the sugars in the onion into increasingly complex and delicious compounds. Try the difference, simmer some raw onion in a small amount of water for ten minutes, and do the same with some onion that has been sweated first. The water with the sweated onions will be distinctly sweeter. Use that sweetness to good effect in your dish. Sometimes when you want some raw effect (especially in stock when you do not want them to be sweet, i use raw onion directly without sweating it first). But for the majority of preparations, we need to heat the onions first, and sweating is the most common of these steps.

There are a few critical things to understand about sweating. The longer the onion is sweated, the sweeter and more complex their flavor becomes. This is your control. Sweat them for a few minutes, just until they’re translucent and softened, and they have one flavor. Sweated for two hours, without color, they are deeper, richer, and sweeter. The “without color” part is important. Once they’ve lost enough water and get hot enough to begin to brown, the flavor becomes radically different from that of sweated onions. When that happen, it is another different process by which it is called caramelizing. Understand the impact sweating has and to evaluate what effect you’re looking for. Make a plan based on what you want. And use the onion to help you get there.

Caramelizing
When most of the water in the onion has vaporizes and the onion begins to brown, we have what we called caramelized onion. Caramelized onions are sweet, savoury and nutty. The key to caramelization is time. You can’t caramelize onions quickly. The onions need to cook in stages, and if you try to use too much heat, the onions will burn before they are even brown. To caramelize onions, peel and slice them as thinly as possible. Heat a little butter or oil in a heavy pot or pan, add the onions, and cook slowly over low heat, stirring occasionally. First they will sweat, then they will drop a lot of water so that they’re stewing in onion water. The water will eventually cook off, and the onions will continue to break down and become brown. While there are infinite gradations of caramelization, practically speaking, the gradations break down into two types: lightly caramelized— when the onions are browned but still retain some of their shape—and heavily caramelized—when a big batch of onions is reduced to what appears to be nearly a darkish brown paste. How much you caramelize your onions depends how you want your finished dish to taste.

The amazing shallot
Shallot works just like the regular onion but has a sharper flavor when raw and a greater sweetness and flavor after it has been cooked or macerated in acid. Sweated, they are a great way to begin almost any kind of savory sauce. Add them raw to mushrooms you’re sautéing and they will light up those mushrooms. Caramelized, they add intense flavors to sauces, soups, and stews. Used whole, they are a great component in stews. Use them and you can bring your home cook to a new level of achievement.

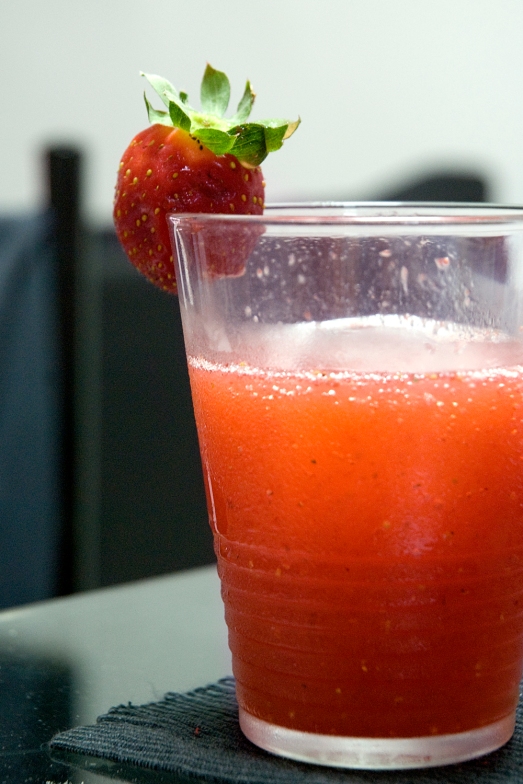
strawberry slushie

I love making slushies and i love strawberries. When i have lots of them to spare after i’ve used them for pies, tarts and other deserts that call for fresh strawberries, this will be my next pick. Look for strawberries that are red, inside and out. The sugar will juice up any strawberries and make them sweeter of course, but it cannot work miracles. So standby a few spoonful of fine sugar to add to the sweetness.

Makes one jug

400g strawberries

a few sprigs of fresh mint

1/2 a lemon

ice cubes

fine sugar, to taste

Hull the strawberries and add them to a blender with a handful of ice cubes, a few mint leaves and the juice of half a lemon. Add enough water to cover and whiz. Taste the mixture and sweeten with the sugar if necessary. Pour into a jug half filled with ice, give it a good stir and serve.

hollandaise

Hollandaise is basically an emulsified butter sauce. It is one of the five sauces of french haute cuisine mother sauce repertoire. The sauce is one the great transformations of butter. Its appearance is light yellow and opaque, smooth and creamy while the taste is rich and buttery. It has a mild tangy acidic taste, a result of added vinegar (or lemon juice substitute) but not too strong to overpower the flavoured dish it accompanies. The sauce is serve warm but not hot and is excellent with beef, poultry, vegetables and fish. Two phases follow: cooking egg yolks and emulsifying the butter. It’s easiest to cook the eggs over simmering water. If you use direct heat, the eggs might be overcook which will results in lumps instead of smooth and silky sauce. After the eggs are airy and hot, you remove the pan from the heat and whisk in melted butter. Some cooks use whole butter and keep the sauce over heat, but I think you have more control using melted butter.
Creating an emulsified sauce using fat(oil/butter) and liquid(water/vinegar/egg) takes time and practise (i personally broke my sauce in the first two attempts) but that shouldn’t hinder anyone to try it. You’ll be rewarded with a wonderful sauce for your patience and once you get it right, you’ll never go wrong again. The chief danger to the emulsion is not having enough water (which includes lemon juice and vinegars). Water content is essential in this sauce is cooked (and thus continuously giving up its water as it vaporizes during the cooking). So the water quantity is critical. When making a hollandaise, I usually keep some water on hand to drizzle in if needed.
The standard ratio for making the sauce is 5:1:1(translates to a weight ratio of approx. 5 parts butter to 1 part yolk and 1 part water). That is, for example, 50 grams yolk and water for every 250 grams of butter. But if you’re making a small batch, just enough to serve 2 like i always do, it by tablespoon measuring, a standard egg yolk is a tablespoon, and ibuse two egg yolks, so that’s two tbsp water and ten tbsp of butter. Remember the ratio and you’re golden whether you’re making large batch or small. After that, it’s all about flavor: seasoning with herbs, aromatics, spices, and acid.

4 teaspoons water

½ teaspoon salt

50g yolks (or 3 large egg yolks)

250g warm clarified butter

2 teaspoons lemon juice, or to taste

First of all, make the clarified butter. Melt the butter in a medium pan over medium heat. Reduce the heat to low and continue to cook the butter. The water will slowly cook off; skim off the white solids that float to the top of the butter that forms on the surface. When the water is cooked off and you’ve skimmed the solids, strain the butter through a fine-mesh strainer to extract any remaining impurities. You should be left with pure yellow butter fat.

Prepare a double-boiler by partly fill a saucepan with water and bribg to a simmer. Bring a bowl and insert in the saucepan (the water shouldn’t touch the bowl), and whisk the yolk and the water continuously. When the yolks have doubled or tripled in volume, remove the double boiler from the burner and begin whisking in the warm clarified butter in a thin stream until it’s all incorporated and the sauce is thick and creamy. If the sauce becomes very thick and shiny, almost as if the water is being squeezed to the surface, or if you sense the sauce is about to break, add a teaspoon of cold water. When the butter is incorporated, taste and add the lemon juice to desire.

Do not be daunted if the sauce breaks, and it will, all you have to do is fix it. Simply get another yolk and a couple of teaspoons of water, warm them a little, and start adding your broken sauce the way you added the butter. You’ll have your sauce back in no time.

pavlova

There’s this old Australian/New Zealand (origins still hotly debated until today) dish which is sweeping the nation into a frenzy, Pavlova. This meringue-based desert, named after a Russian ballerina, Anna Pavlova, is basically French/Swiss meringue topped-off with whipped cream and fruits such as berries. I’ve never actually heard of this desert until the missus made me swear an oath to find her one and from there i learned it’s existence. I had to search hi and low for this, going to every single Ben’s and Delicious’ joints where they seem to run out of. Honestly, there’s nothing really special about the desert (that is worth fighting over it my dear Aussies and Kiwis), but it is simple enough and fun to make, and satisfying for those sweet tooth cravings.

Make one 9-inches meringue

3/4 cup fine sugar

2 teaspoons cornstarch

3 egg whites, room temperature

1 teaspoon vanilla extract

3/4 teaspoon white vinegar/lemon juice

fresh strawberries, lots of them

Preheat oven to 120 degrees C. Line a baking tray with a baking sheet or parchment paper. Whisk the sugar and cornstarch in a bowl until they combine into a single mixture. In another bowl, whisk egg whites until they are foamy and have a thick, ribbony texture. Pour the sugar mixture gradually into the egg white mixture while whisking vigorously until completely incorporated, and continue whisking until the egg whites are glossy and thick. Add the vanilla and vinegar/lemon juice into the egg white mixture; continue to whisk until you can lift your beater or whisk straight up and the egg whites form a sharp peak that holds its shape. Spoon the mixture onto the prepared baking sheet; spread out into a 2-inch high by 6-inch wide circle, but they need not be symmetrical. Bake in the preheated oven for 1 hour. Turn off the oven, crack open the oven door and let the Pavlova cool for one hour.

To serve, transfer Pavlova to a serving plate. Top with whipped cream and fresh strawberries (or any fruits that you desires).

spaghetti and meatballs

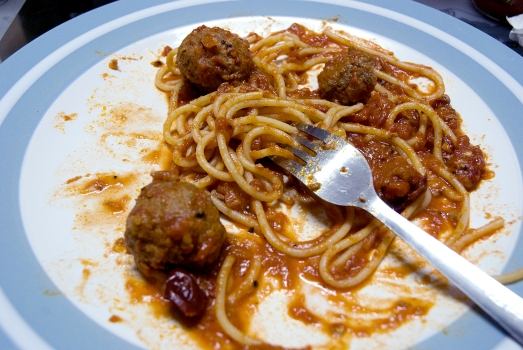
Meatballs are fantastic! Meatballs are amazing! They’re easy, fast and simple. They’re so easy, that i always wondered why are there still people buying those frozen ready-made meatballs? I have two kids to tend to, and always reached home from work by the time the sun has gone down, yet i have time to make those wonderful meatballs everytime i felt like having them as dinner. They’re wonderful to have with simple tomato sauce, whether accompanied by chunks of bread or by pasta, they’re great with vegetable broth, or by having them as sandwiches. Their potential are endless, yet so simple – all you need is good quality minced meat.

For the meatballs

500g minced meat

1 large egg

1 large onion, finely chopped

50g of breadcrumbs/12 pieces of cream crackers

a handful of fresh flat leaf parsley, finely chopped

1 cup of freshly grated Parmesan cheese

salt and freshly ground black pepper

For the tomato sauce (serves 4)

1 onion, finely chopped

2 cloves of garlic, finely chopped

2 cans of 400g chopped plum tomatoes

400g of spaghetti

a handful of freshly grated Parmesan cheese

salt and freshly ground black pepper

extra virgin olive oil

To make the meatballs: In a large mixing bowl, add the minced meat, chopped parsley, egg, the Parmesan cheese and a good pinch of salt and pepper. If you’re using the cream crackers, wrap the crackers in a clean towel and smash up until fine, breaking up any big bits with your hands and add into the bowl. If you’re using the breadcrumbs instead, add them into the bowl. With clean hands scrunch and mix up well. If you feel the mixture is still to sticky and would not hold up shape, add some of the breadcrumbs until the mixture have a good consistency and can be shaped. Shape the meatballs into the size of golf balls (or bigger, depending on your preference, but not too big or it will be hard for them to cook properly) and then pat them down so they can evenly cook. Drizzle them with olive oil and jiggle them about so they all get coated. Put them on a plate, cover and place in the fridge until needed.

To make the tomato sauce: Put a large pan of salted water to boil. Heat a large sauce pan on a medium heat and add 2 lugs of olive oil. Add your onion to the pan and stir until softened and lightly golden. Then add your garlic, and as soon as they start to colour, add the tomatoes. Bring to the boil and season to taste. Meanwhile, heat a frying pan and add a lug of olive oil and your meatballs. Stir them around and cook for 8–10 minutes until golden (check they’re cooked by opening one up – there should be no sign of pink). Add the meatballs to the sauce and simmer until the sauce thickens, around 20-30 minutes, then remove from the heat. Once the pasta is cooked, stir them to the tomato sauce, add the Parmesan cheese, correct the seasoning and serve immediately.

pesto

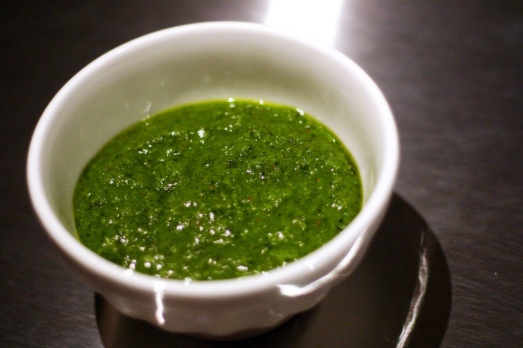
Nothing beats the taste and freshness of a home-made pesto. It it so easy and so universal, you can use it for any purpose and companion for any dish you could think of. Most people associated pesto with pasta and pasta only, when in reality, you can pair pesto with just about everything, roasted chicken, shellfish, bruschetta, fish, veal, steak, roated vegetables, jacket potato or with cheeses such as balls of Mozarella, the list is endless. You can make pesto in a food processor, or traditional pestle or mortar (i can attest that pounding pesto in pestle and mortar over time would results in a firm biceps and triceps!) Toast the pine nut lightly, though some would prefer to do them until they’re colored, which would develop a creaminess taste rather that nutty one.

Serves 4

1/2 a clove or garlic, chopped

salt and freshly ground black pepper

3 handfuls of fresh basil, leaves picked and chopped

a handful of pine nuts, very lightly toasted

a handful of Parmesan cheese

extra virgin olive oil

Pound the garlic with a little pinch of salt and basil in a pestle and mortar, or pulse in a food processor. Add the pine nuts and continue the pounding (or pulsing). Remove the mixture into a bowl and add half of the Parmesan. Stir and add the olive oil – you need just enough to bind the sauce and get it to an oozy consistency. Season to taste with salt and pepper, then add the rest of the Parmesan and pour in some more oil and taste again. The key is getting it right to keep tasting and adding cheese or oil until you have the righ semi-wet but firm mixture. Optionally, you may add a squeeze of lemon juice at the end to have a little bit of acidic taste into the pesto, but it’s not essential.

** To have an authentic Genovese pesto, use pecorino Romano cheese, or Parmigiano-Reggiano instead of Parmesan. These type of hard sheep’s milk cheese, gives out a much strong flavour to the cheese. Unfortunately, both these cheese are considered an indulgence, expensive and such a rare variety that to-date, i have yet to find any grocery store (Tesco, Carrefour, Jusco, Cold-Storage, Isetan, or even Mercato) that actually have these cheese on their shelves.